

GD70
-
Posts
633 -
Joined
-
Last visited
Content Type
Profiles
Forums
Events
Posts posted by GD70
-
-
1 hour ago, Rich W said:
Glenn, thanks so much for sharing your restoration processes with the rest of us. After seeing your work, it motivates me to tackle some AR- 4x cabinets that I once thought too far gone. By the way, I hestitated on that pair of AR-LST2's from Long Island, only to regret it later. So glad they wound up in such competant hands - that was one first class restoration!
Hi Rich!
Thank you! It makes me very happy that I inspired you to tackle the 4x's. As you can see, it's not difficult, just take your time.
When I saw the CL listing for the LST's, I also hesitated, for an hour or two, wasn't that familiar with them. After doing some quick web investigation, I realized these were fairly rare, and worth buying and restoring. The seller had a buyer that didn't show, I said when and where can we meet, and the deal was sealed. He told me when we met, he had a ton of offeres for more that 3 times what the listing price was., but he was good to his word and we had had a deal.
That was a really fun project, and when it was completed, in a way I was sad. I had worked on those for a good amount of time, but was also very happy with the finished project.
Glenn
-
2 hours ago, samberger0357 said:
What kind of selector do you use?
Monoprice is the brand.
From their site:
Spread your sounds around your home or business with this Monoprice 8-Channel Speaker Selector!
This speaker selector allows you to connect up to eight stereo speaker zones. Each zone can be individually toggled on or off with the front panel switch. Built-in impedance-matching circuitry ensures that the overall impedance level to the amplifier does not drop below 5 Ohms, no matter how many speaker zones are selected or how many speakers are in each zone.
The impedance-matching protection circuitry can be disabled using a front-panel button, but this should only be done if there is another protection circuit employed or the system is carefully designed to avoid amplifier damage. The unit can handle up to 100 watts per channel with the protection circuitry enabled and up to 200 watts per channel with the protection circuit disabled.
Glenn
-
4 hours ago, samberger0357 said:
Wait until you stack them with the 3a's. The best is yet to come.
It will be two pairs of 3's, and yeah, stacking has crossed my mind! The beauty of my multi speaker selector is its circuitry will not allow the amp to see anything below 5ohms regardless of how many speakers are playing simultaneously.
Also got the grill frames cut today so now I have to decide, Saran, or Linen.
-
Damn! These are sounding fantastic! I've been listening primarily to my ADS 910's which are amazing!
The 3's are right back in the game, and it makes me realize my first pair mids will need Roy's attention.
More that thrilled I found these and they are singing so well.
-
I'm a happy camper! Roy was able to save the mids! Shipped them back to me today so hope to have these singing maybe next week after the cabs are refinished.
Also cleaned the pots and polished the disks and they are working fine.
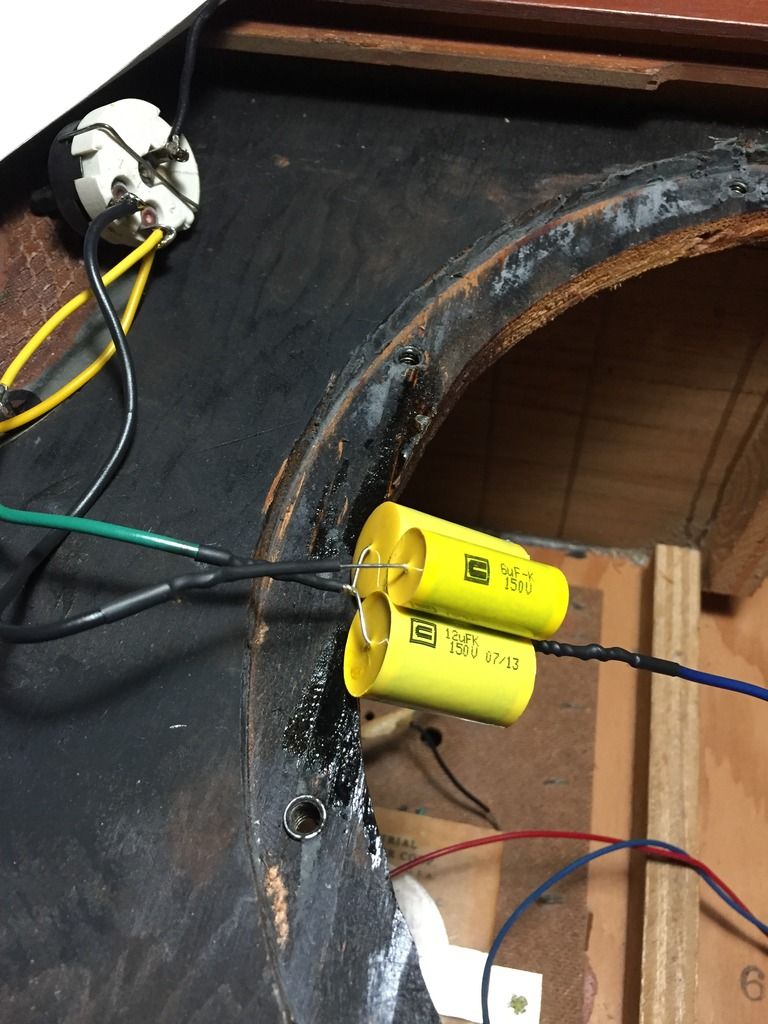
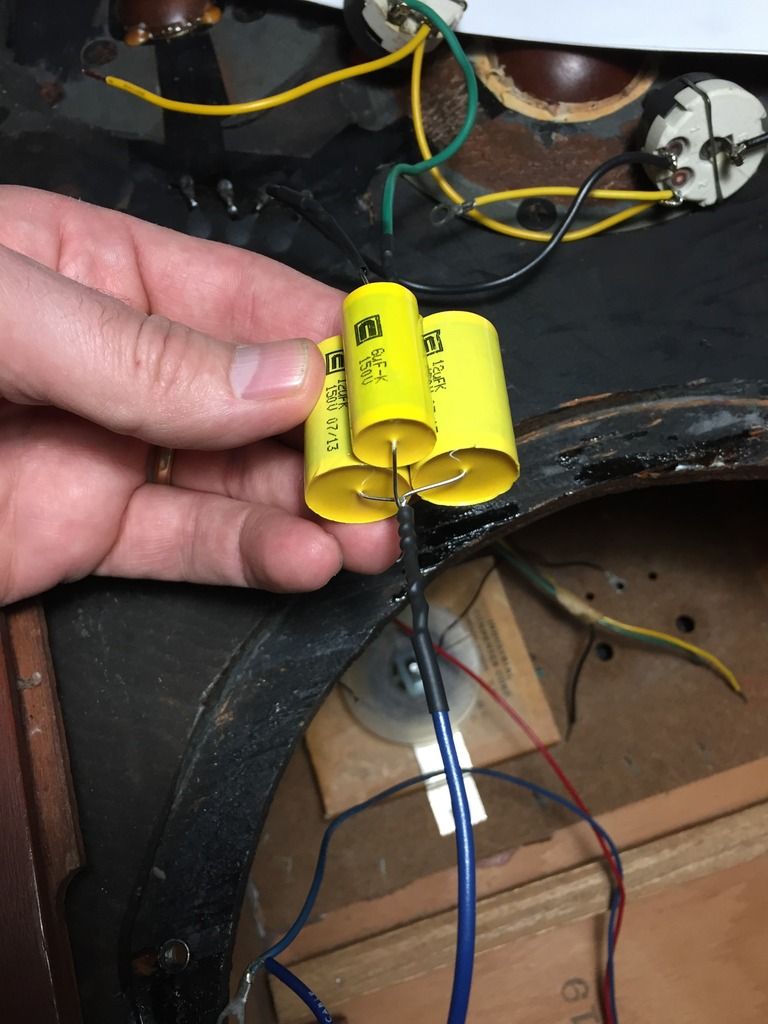
Success! Initial testing, these sound great! Now to solder the mids leads, glue the caps in place to the rear baffle, put the stuffing back in and onto the grills!
Roy, the mids sound fantastic! Loud and clear as a bell!
Glenn
-
7 minutes ago, samberger0357 said:
The suspense is killing me.
Yeah, me too! Soon!
-
2 hours ago, DavidDru said:
Been meaning to ask you, with doing so many applications - 9 on these - of the Watco, how much time you waiting between applications etc? Good thing with the Watco is the fact you dont have to wait an entire 24 hours between applications like you do on other oils.
Hi David,
Early on, every 3-4 hours for the first 4-5 applications. Once it stayed tacky for 6 hours or more, then I let them sit for 24 hours before the next coat and sanding with 600 grit.
By the 9th application, it takes a full 24 hours at least to dry. By now, the wood is not absorbing anymore oil, and it's just a build up now. After fully dry, I hand rub them with a paper towel, then a cut up t-shirt.
Glenn
-
Thanks!
I hand rubbed the cabs last night and they have a very nice satiny finish now.
So tonight I hope to start sonic tests.
-
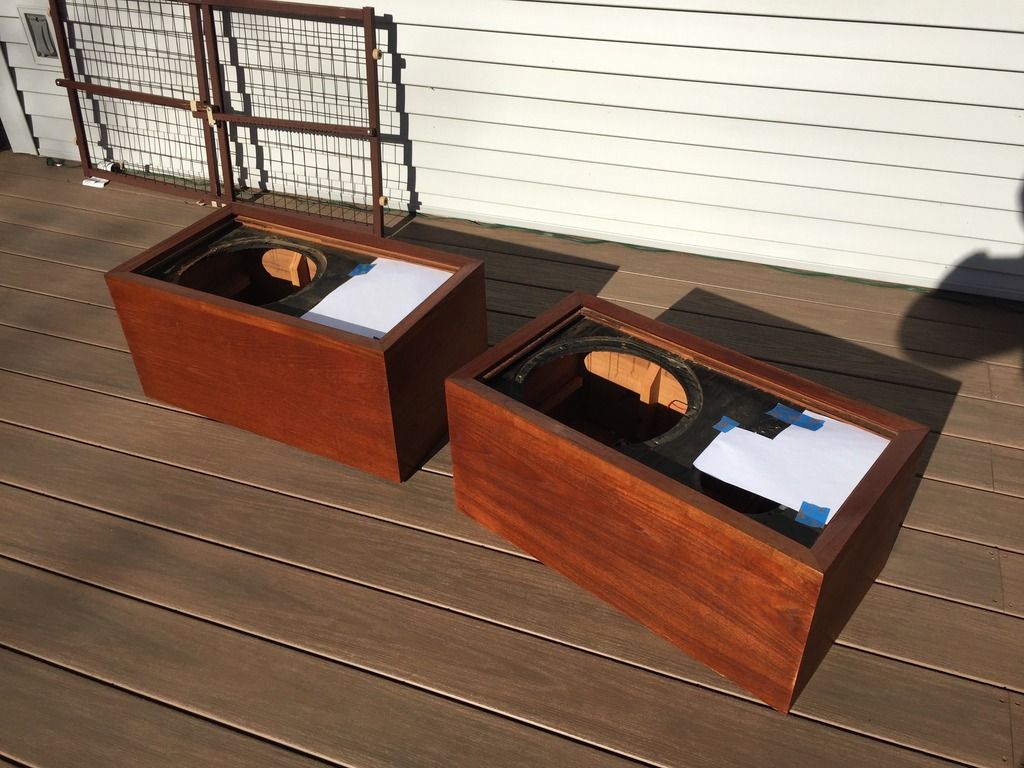
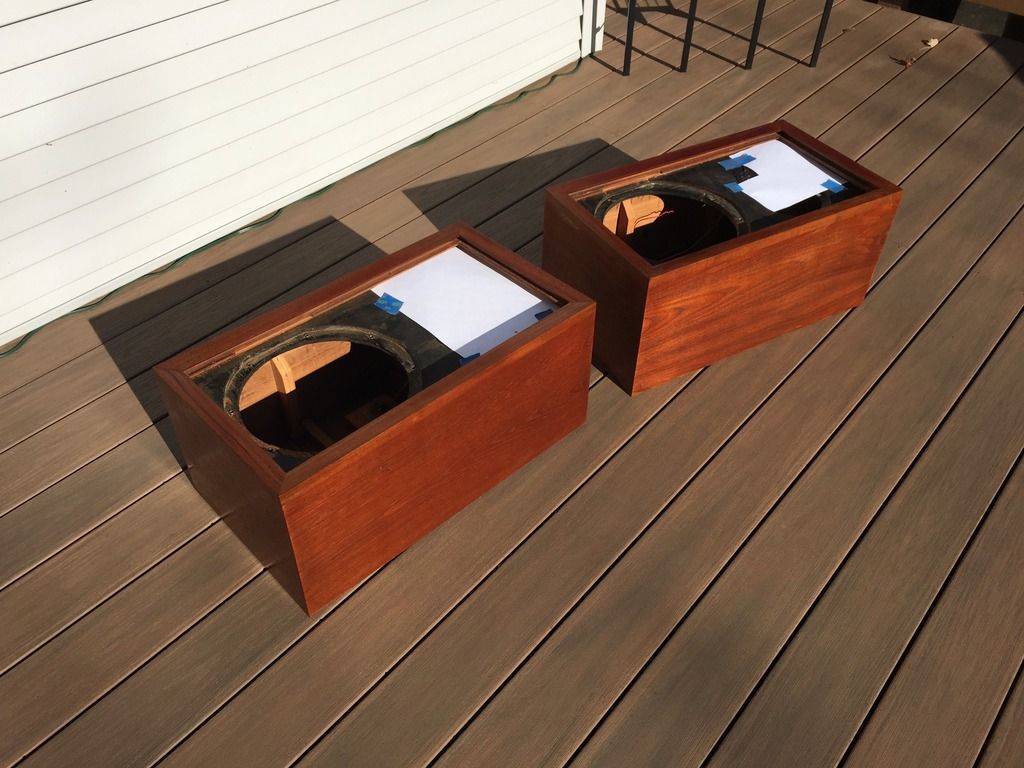
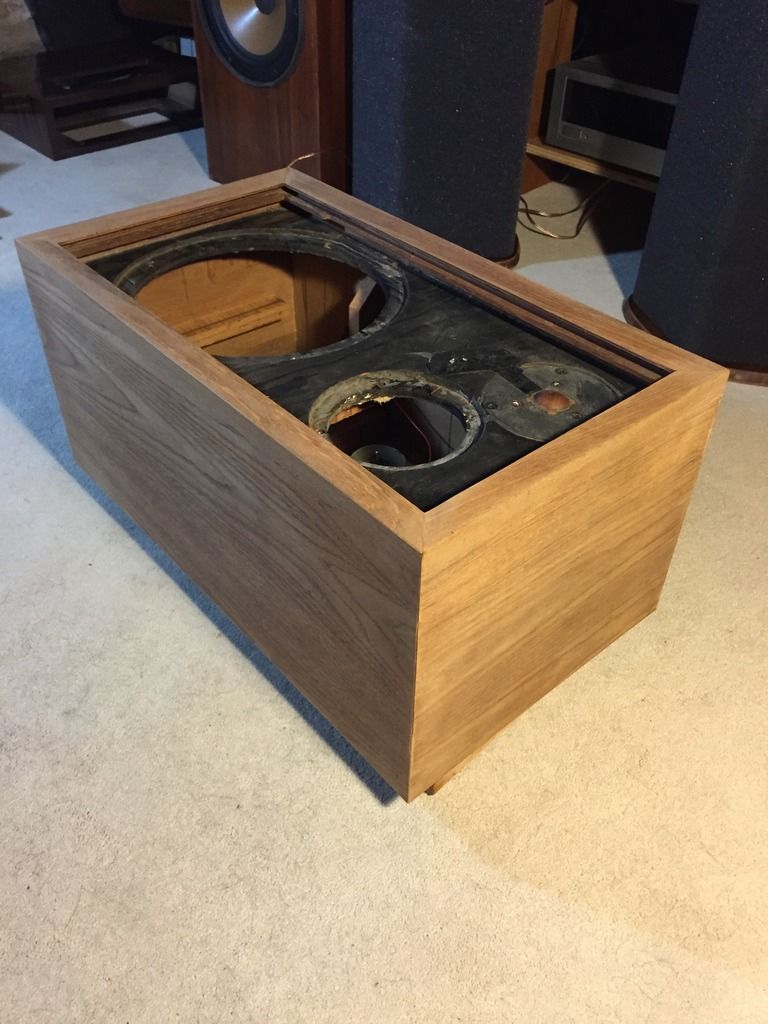
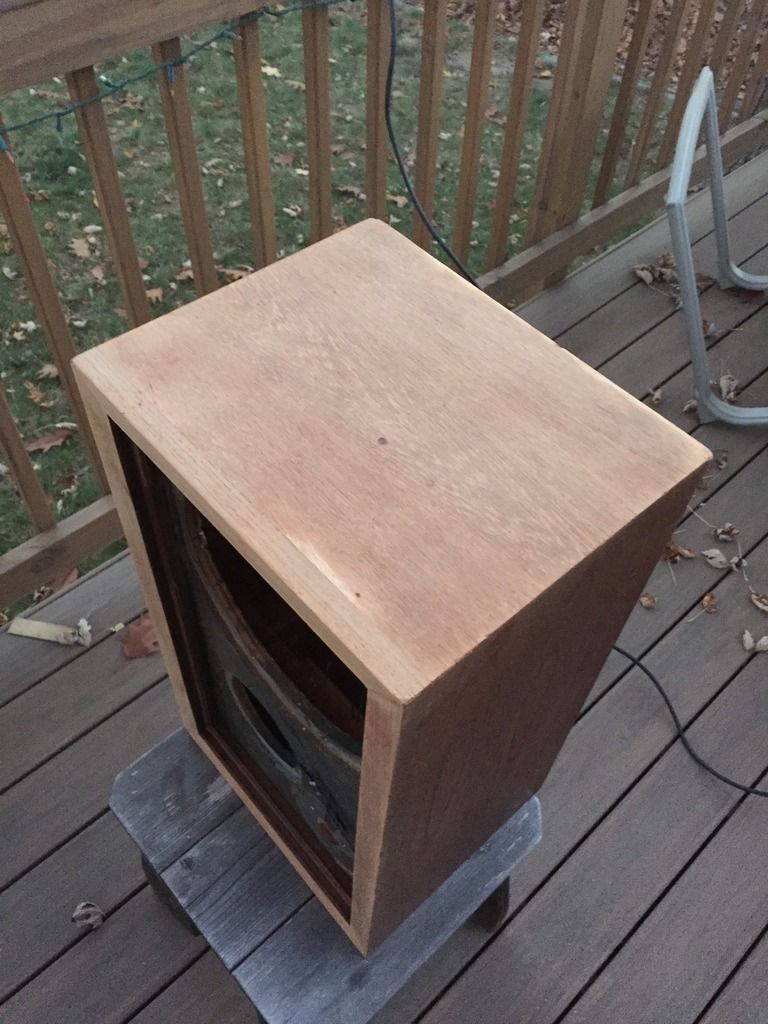
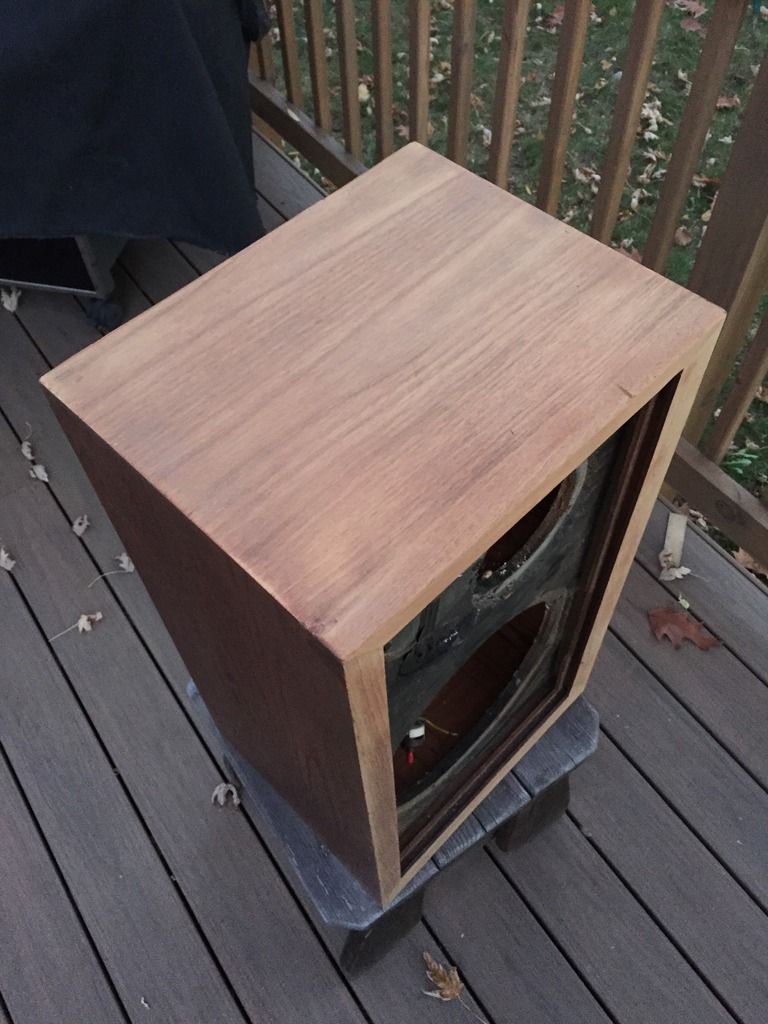
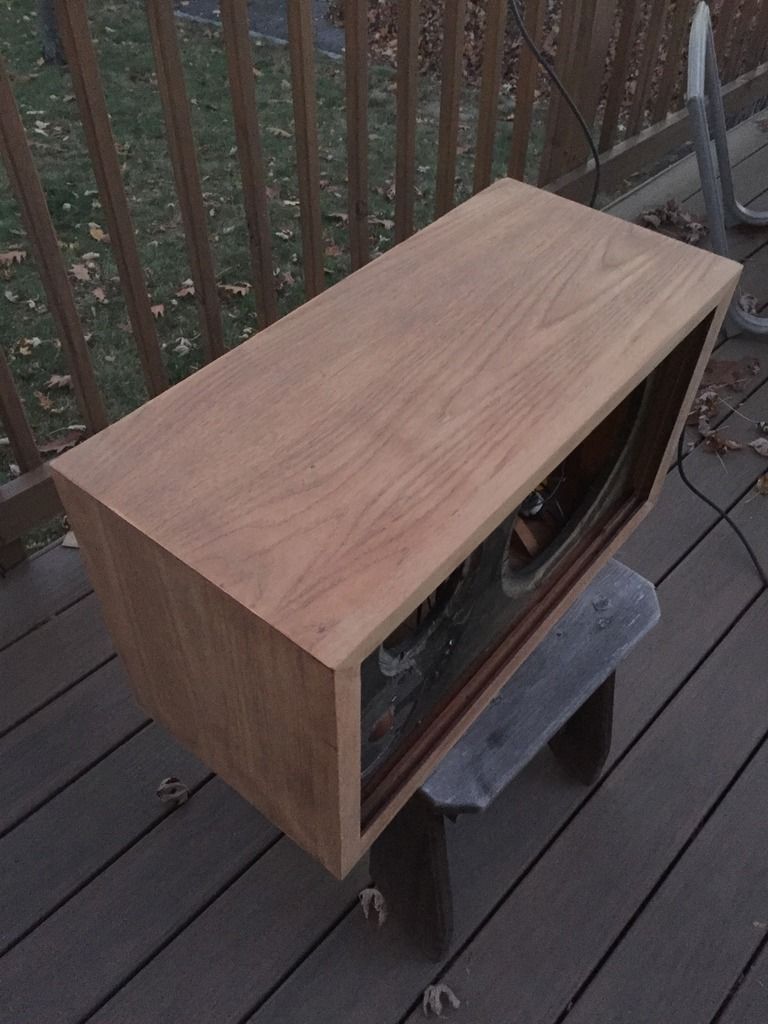
The cabs are done! 9 applications of Watco's oil!
Sitting out in the sun to air them for several hours.
Also plotted out the grill frames. I have a friend who is a master craftsman, does historic restoration and has a great shop in his garage, so I may ask him to cut them for me. I'm leaning towards getting the Saran material for an original look but we'll see.
If the cabs are completely dry this evening, I'll temporarily mount the drivers for final testing, and if all is good, put everything back in permanently. I'm really looking forward to hearing these with Roy's restored mids!
Here's a few more pics.
-
On November 23, 2016 at 7:59 PM, JeffS said:
Glenn,
Your great patience and skill has brought another classic pair of loudspeakers back to near new condition. Your documentation of the process is invaluable for anyone wishing to repair and re-veneer cabinets. I know what you mean about that first coat of oil being sucked in. Some of these cabinets haven't had oil applied in decades!
Thanks Jeff!
The first 3 oil applications were sucked right up! I've done 5 on this cab and it's still absorbing it.
I've done two applications on the 2nd cab, same as the first, absorbing the oil like a thirsty runner!
I can see this will take some time and many applications to start to get a nice smooth surfaces.
Happy Thanksgivng!
-
They look great!
-
6 hours ago, ar_pro said:
Excellent photos - thanks for showing your process, Glenn.
This is the kind of detail that could encourage & assist others who are interested in restoring those speakers that are not in the best cosmetic condition!
6 hours ago, ar_pro said:Excellent photos - thanks for showing your process, Glenn.
This is the kind of detail that could encourage & assist others who are interested in restoring those speakers that are not in the best cosmetic condition!
Thanks! Photos often show and explaine way better than trying to describe it in writing.
Its not that difficult, just takes time to do it right.
Glenn
Just now, GD70 said:Hi Robert!
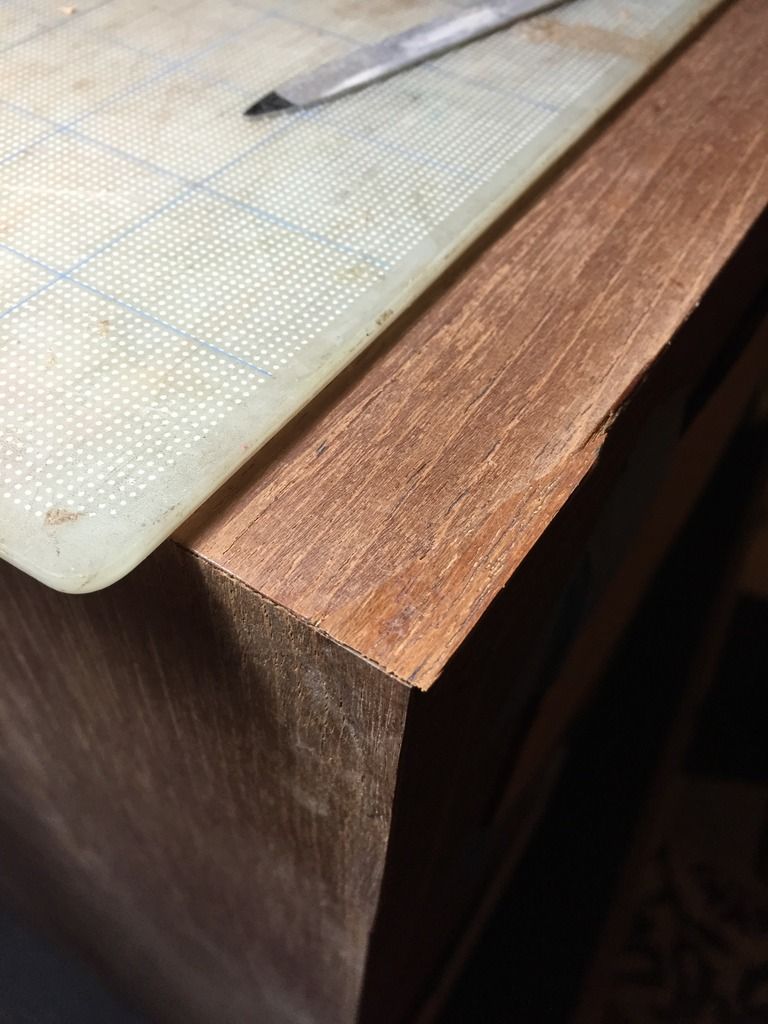
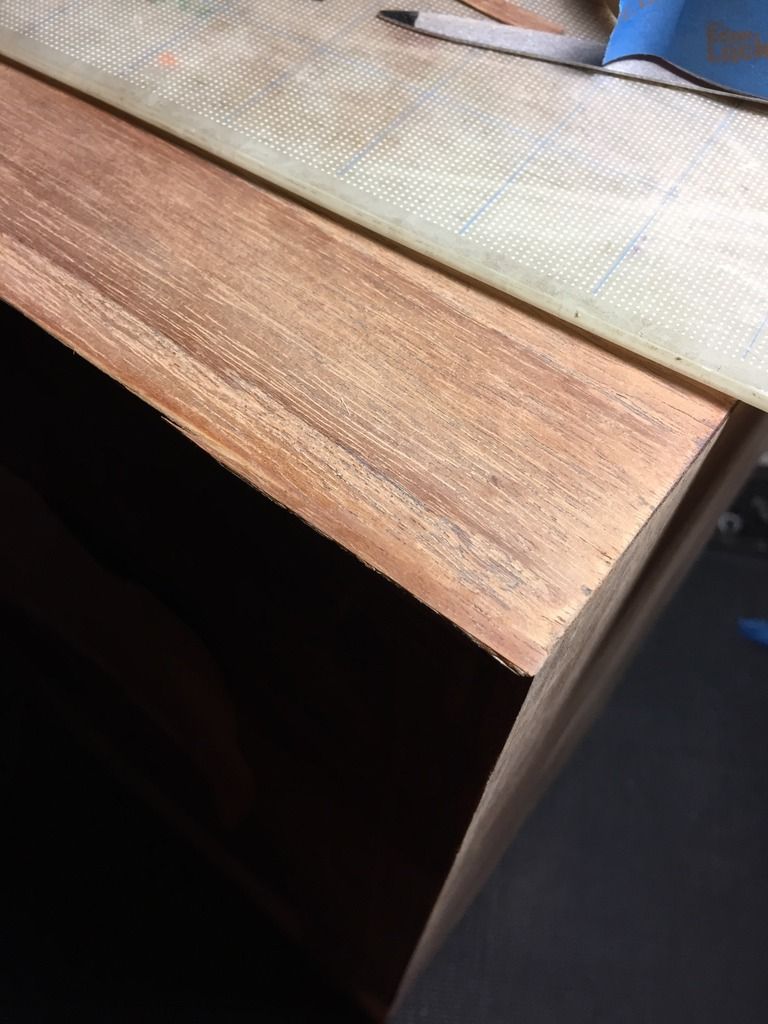
I only use an Xacto knife with #11 blades. After the glue dries, I shave the overhang down so it's almost flush with the back surface, then sand it until it's smooth with the back, and on the top surfaces.
I use Tite bond wood glue. If there's gaps under the patched veneer and where the corner was crushed in, I fill that cavity with epoxy. This is how I do all of my repairs like this. The only time I use super glue is when laminating two pieces together for a thicker piece.
Glenn
-
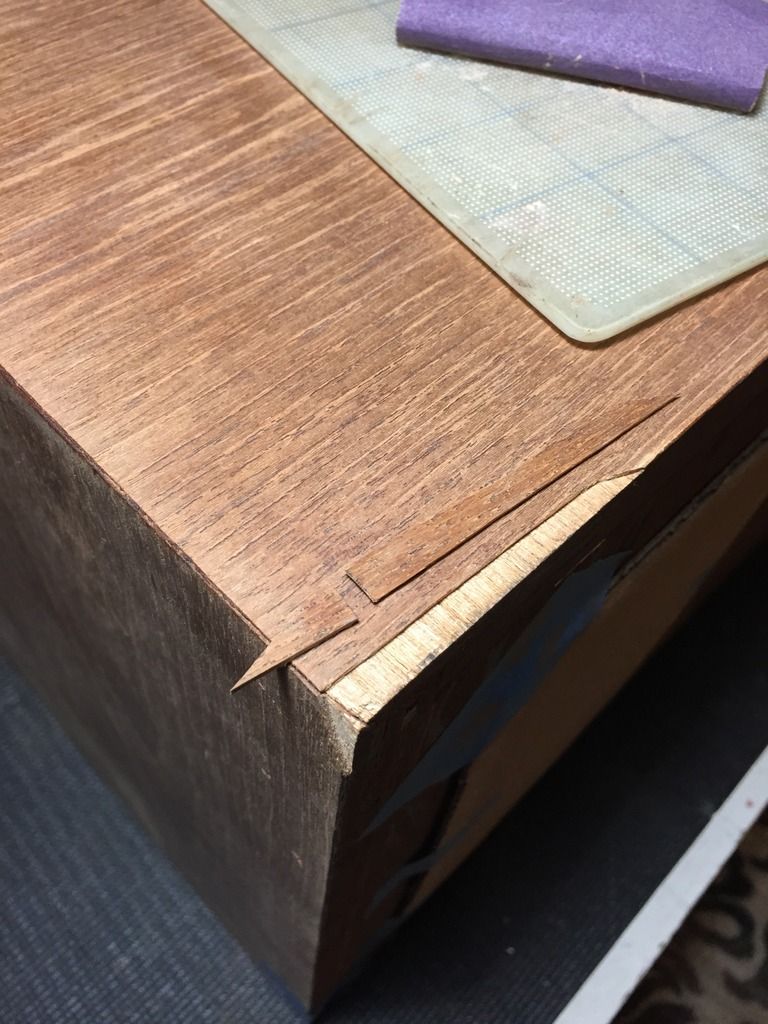
6 hours ago, ra.ra said:
What is the preferred method for trimming the overhang on the veneer patch? Utility knife? Razor sharp chisel? Sanding block? Sledge hammer?

And, is that ordinary yellow wood glue used to secure the patch? Thanks.
Hi Robert!
I only use an Xacto knife with #11 blades. After the glue dries, I shave the overhang down so it's almost flush with the back surface, then sand it until it's smooth with the back, and on the top surfaces.
I use Tite bond wood glue. If there's gaps under the patched veneer and where the corner was crushed in, I fill that cavity with epoxy. This is how I do all of my repairs like this. The only time I use super glue is when laminating two pieces together for a thicker piece.
Glenn
-
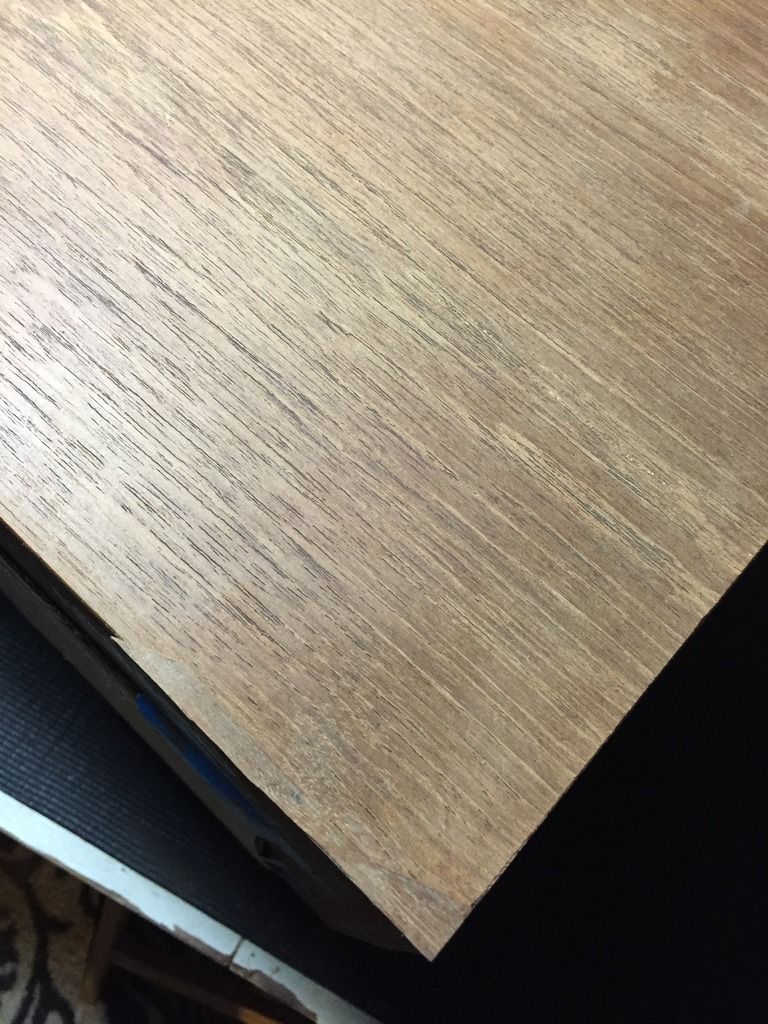
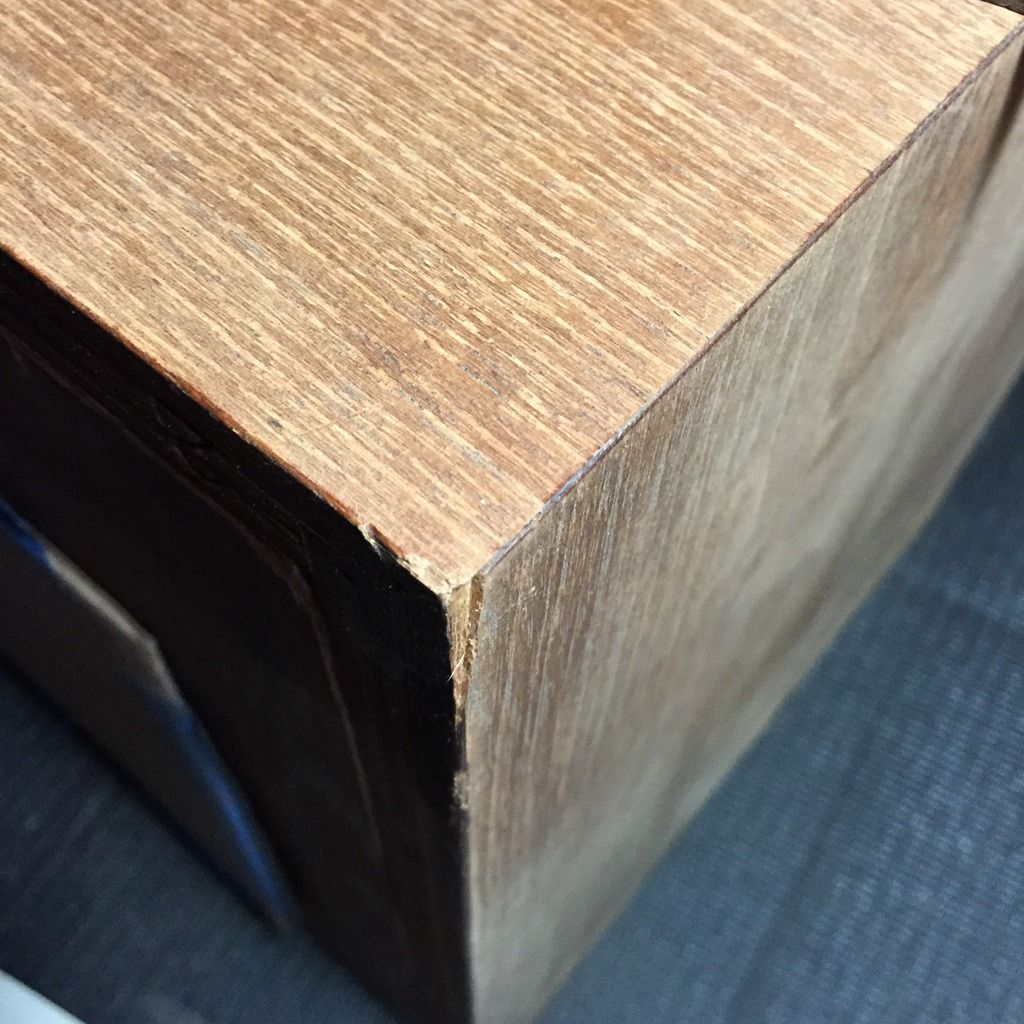
More progress. Finished a few more corners, and the first cab has 3 applications of Watcos. The cab was so dry, it sucked in the oil and practically dried instantly! I added 3 more applications and letting it sit for 24 hours to do the first sanding with 600 grit.
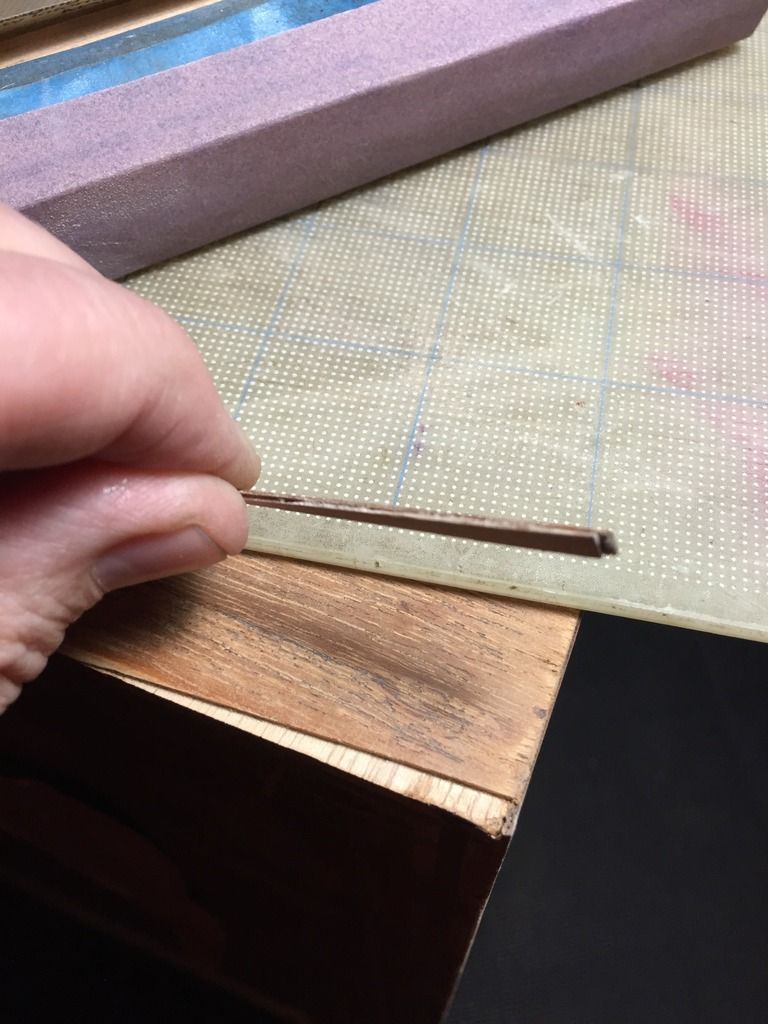
The veneer patch ready to be glued. The original veneer is pretty thick, and I need to laminate two pieces together for the correct thickness.
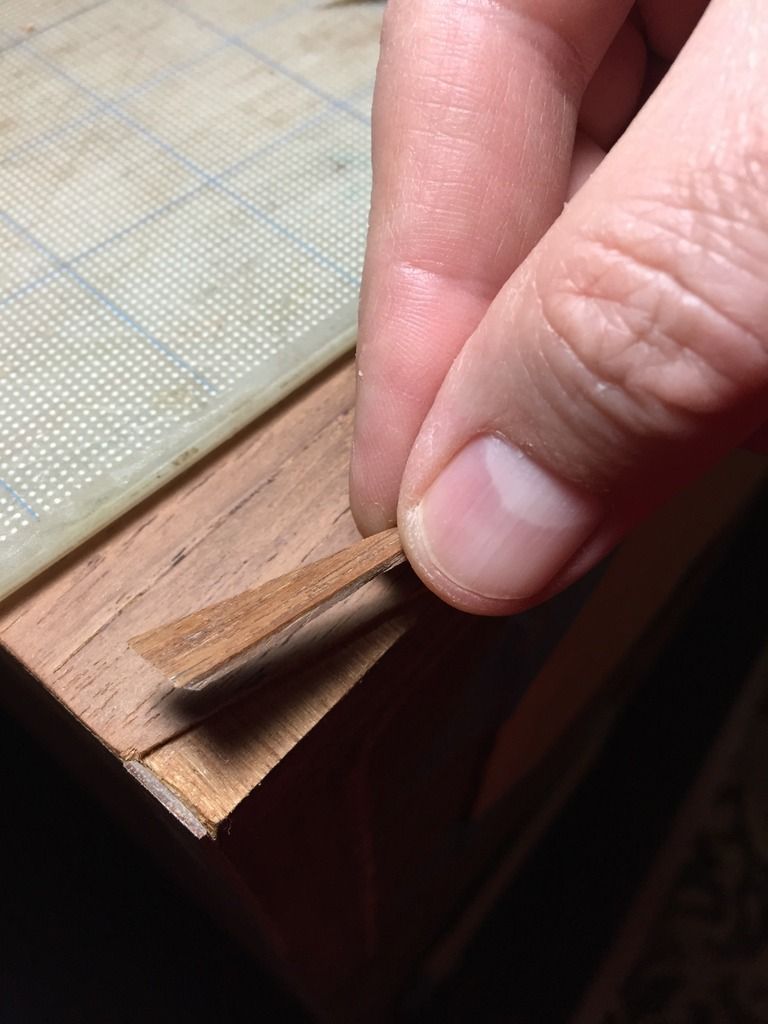
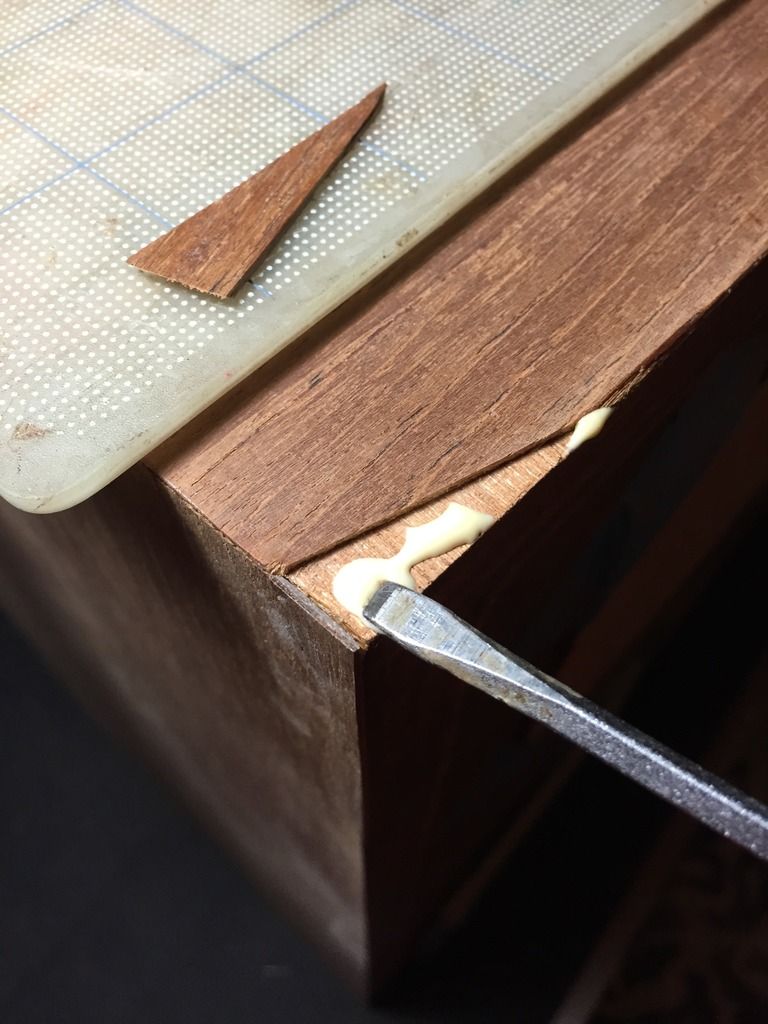
I like to spread the glue with a small screw driver blade.
Two pieces laminated using super glue. Then trimmed to fit.
Both pieces for this corner.
Cab oiling, the best part! Before and after.
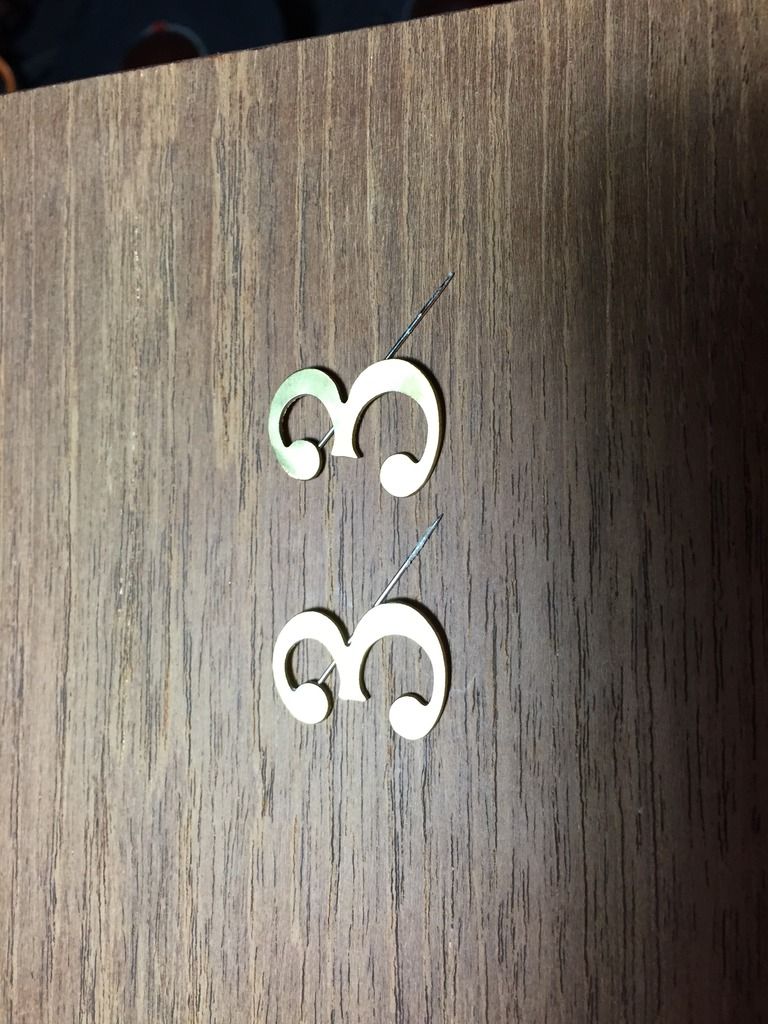
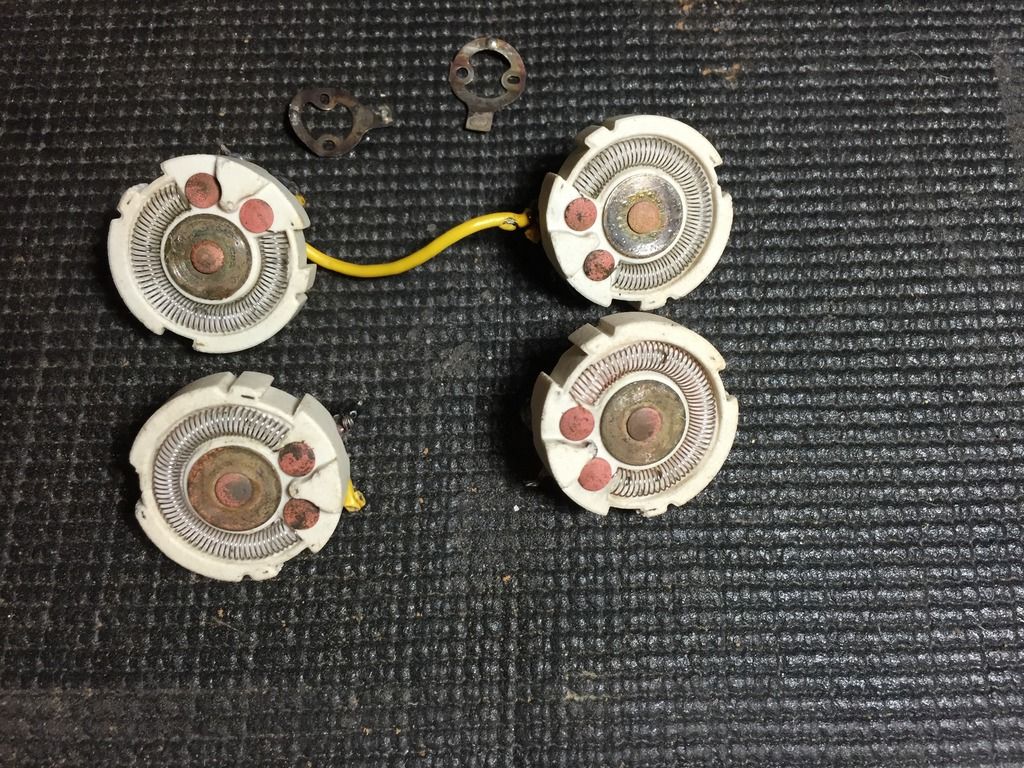
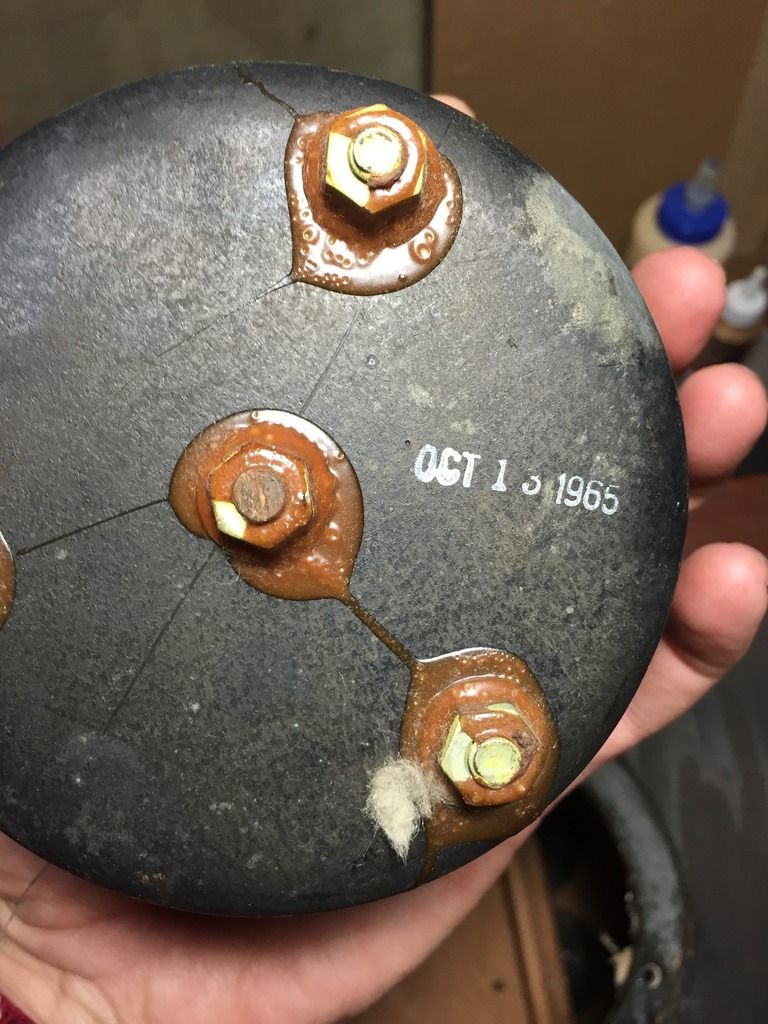
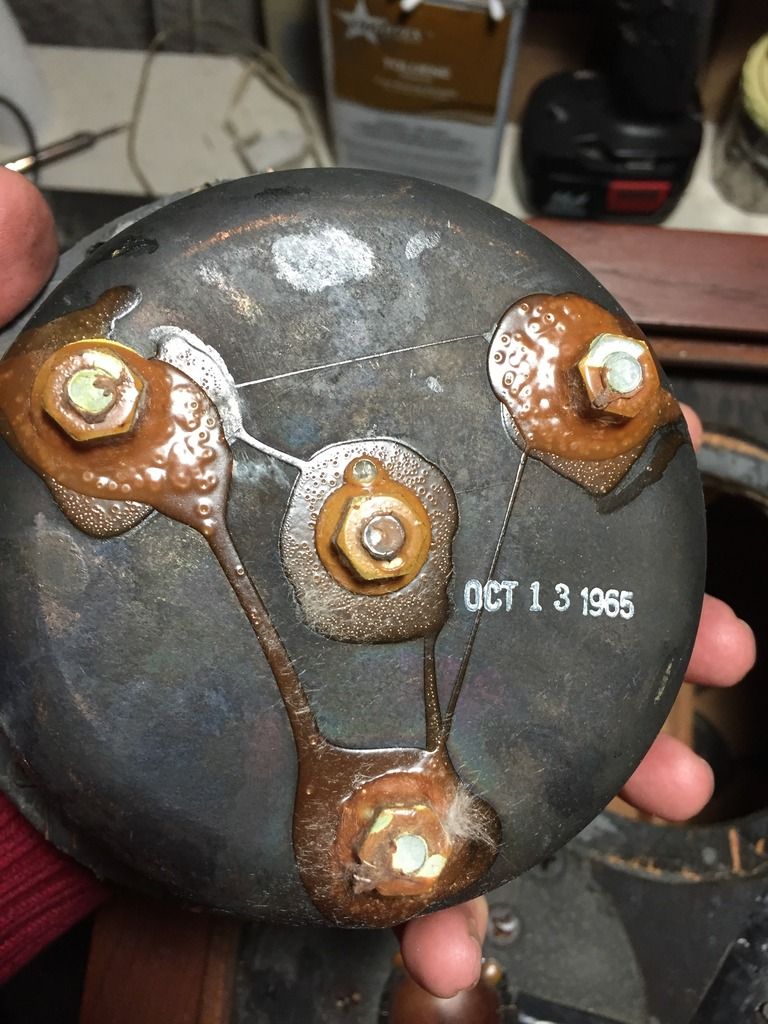
The 3 pins from Roy.
-
Thanks gents! Documenting this kind of repair helps others see it's not so hard, just takes time.
Also very important is to have OLD veneer harvested from old speaker cabs. The aged wood patina is difficult to match otherwise.
Glenn
-
Made some progress this weekend, and received my repaired mids from Roy!
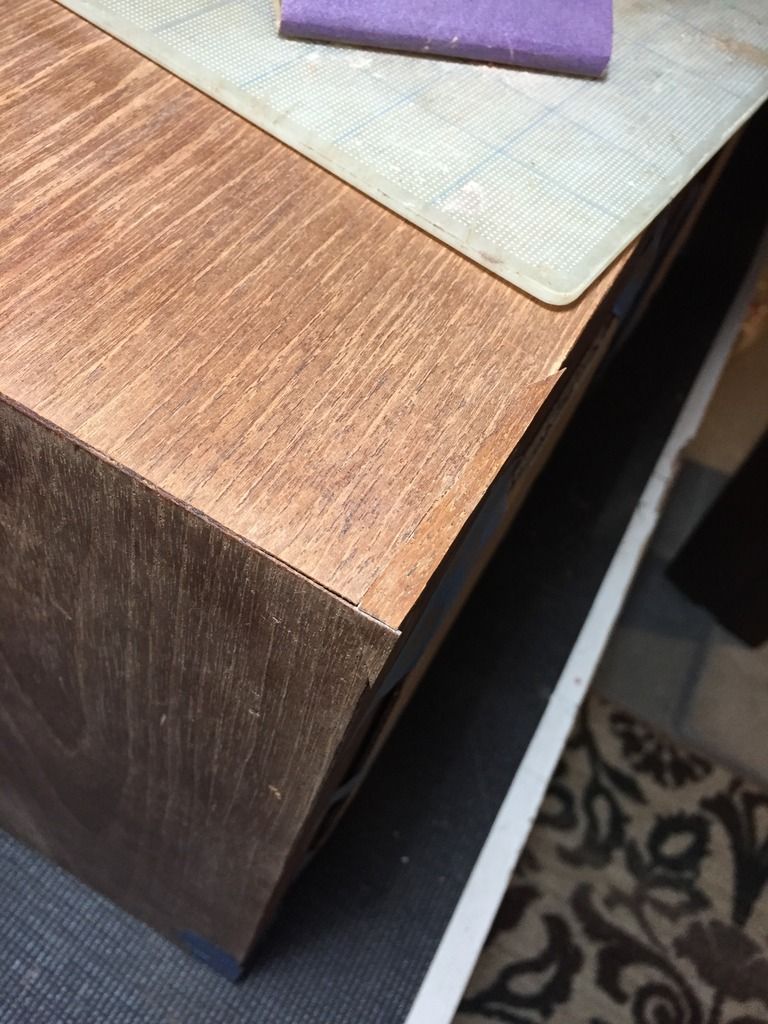
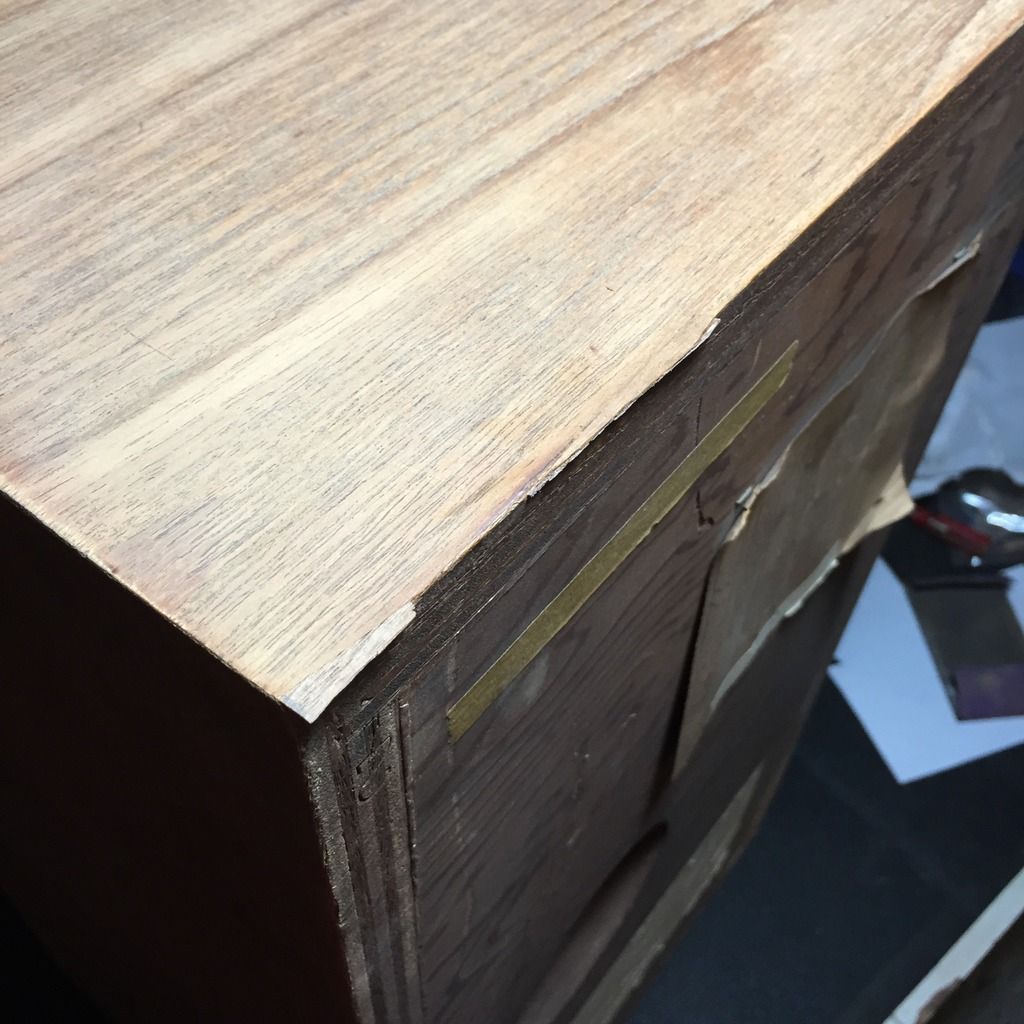
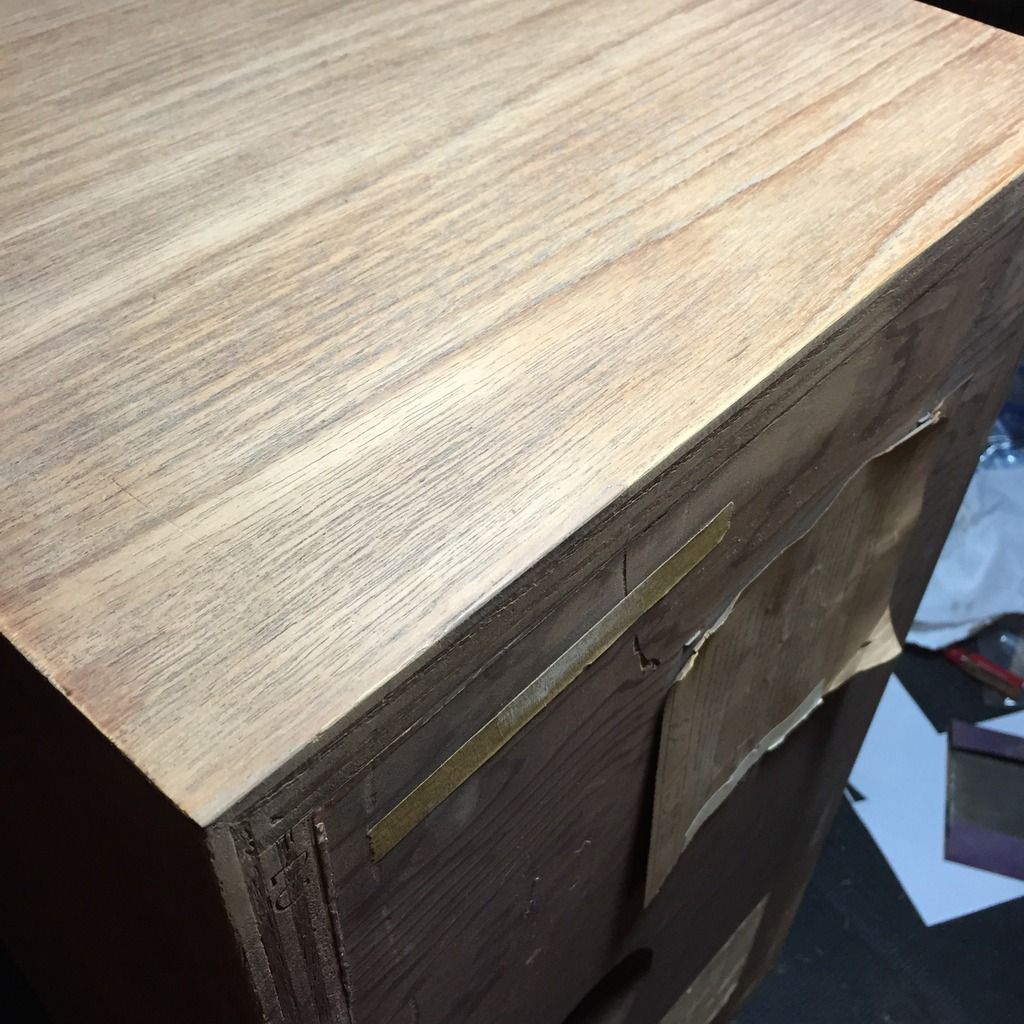
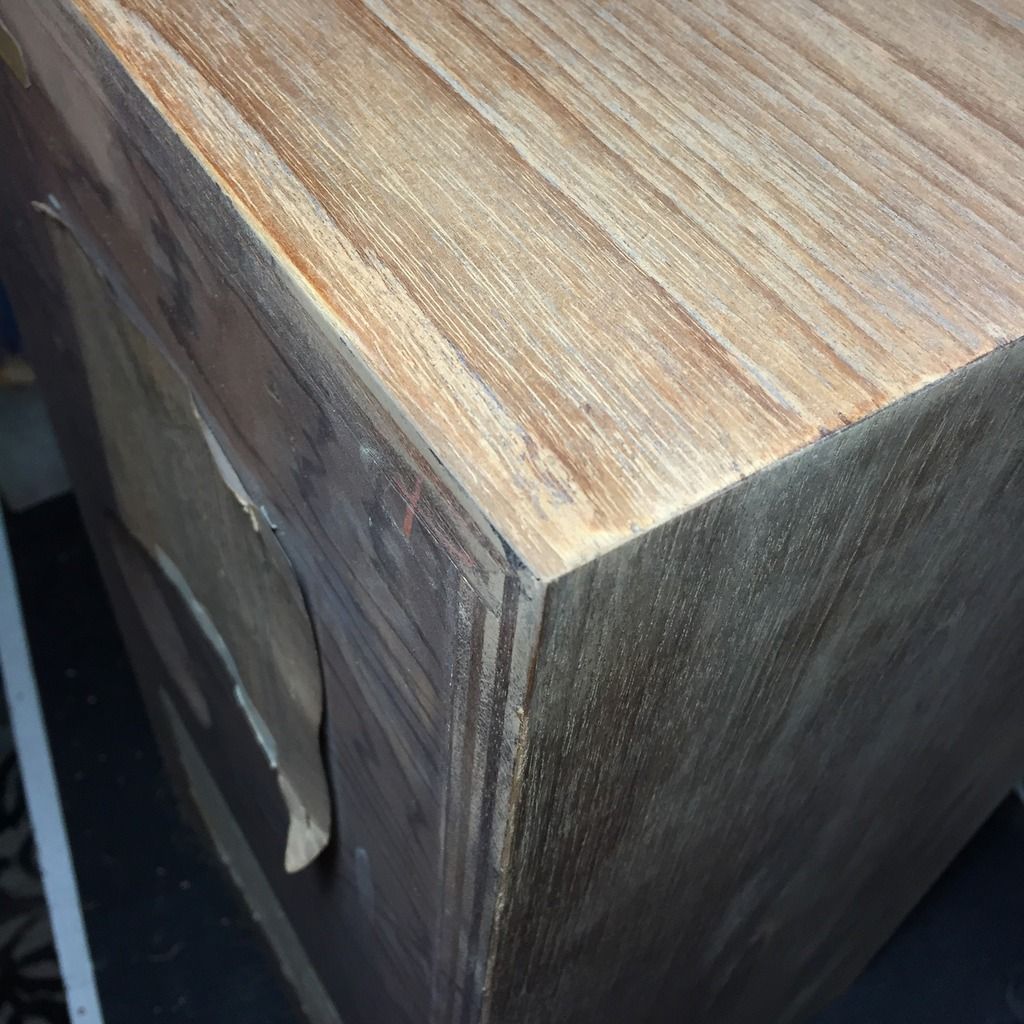
I got the 2nd cab sanded and started veneer repairs on both. I'm almost done, one or two corners still to do.
The veneer on the 3's is pretty thick and the veneer from other speaker projects is thinner, so i have to add another layer of newer veneer I have so it will be level with the speaker surface.
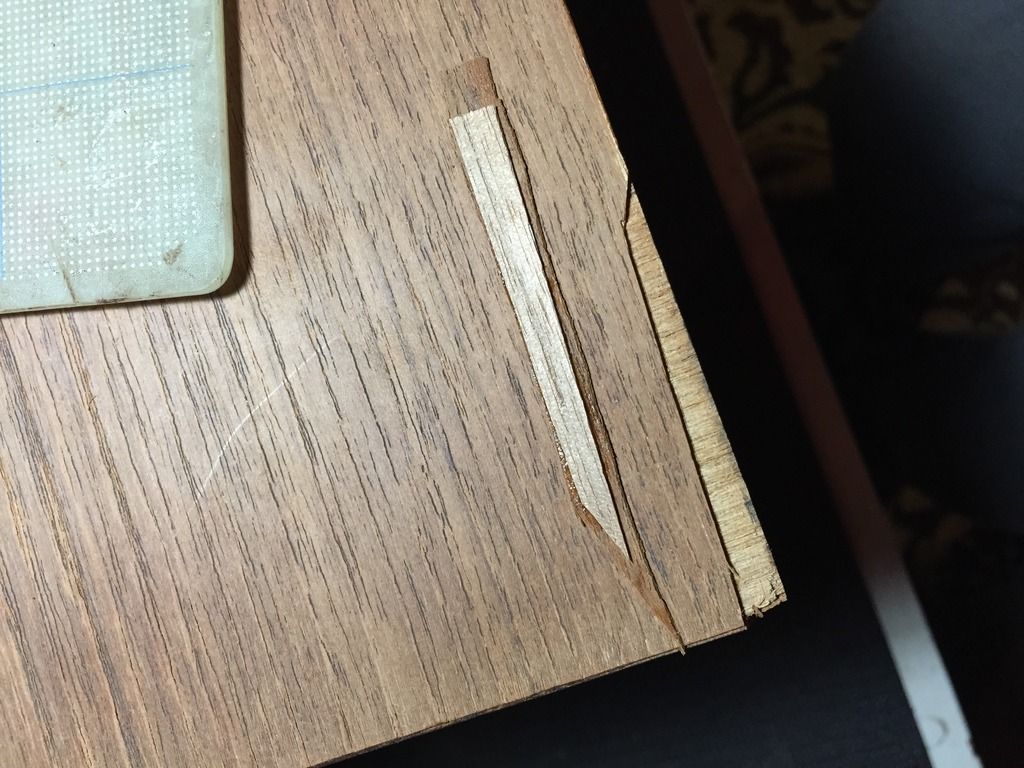
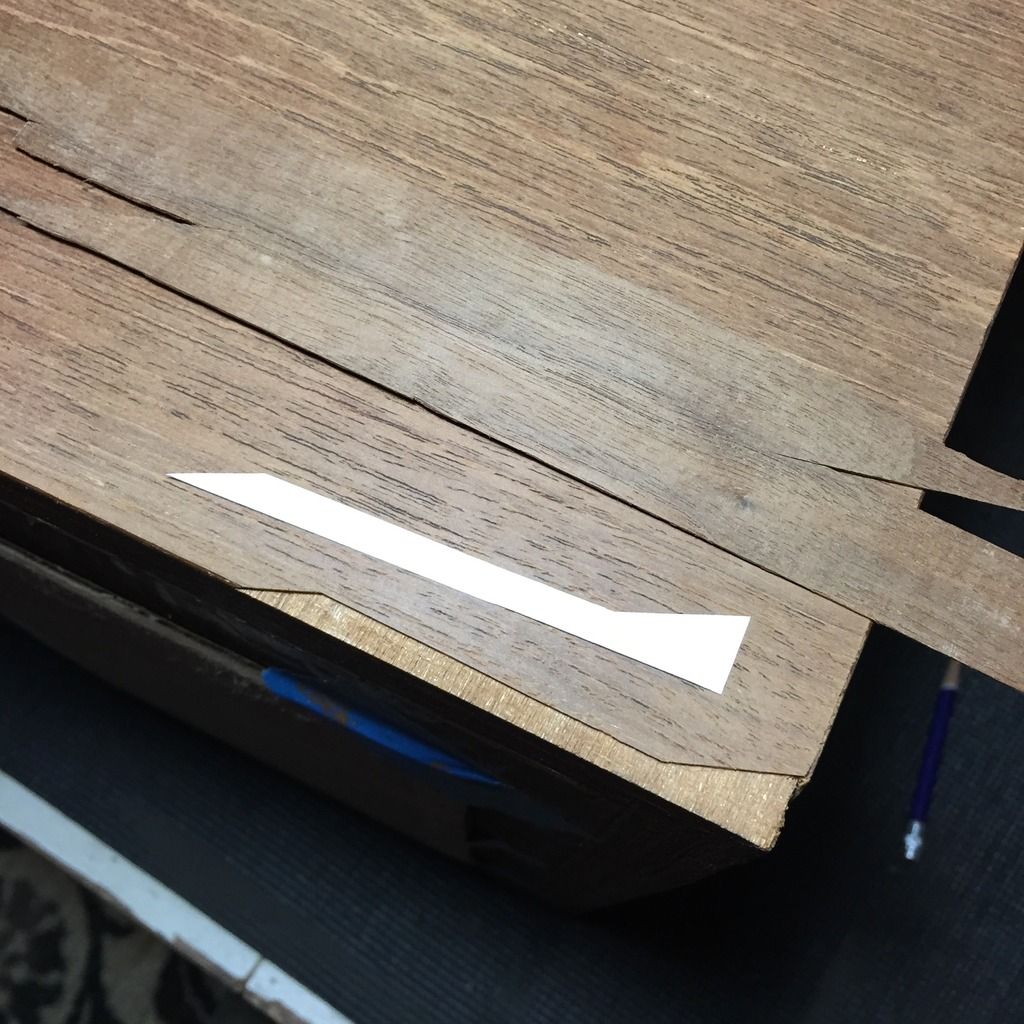
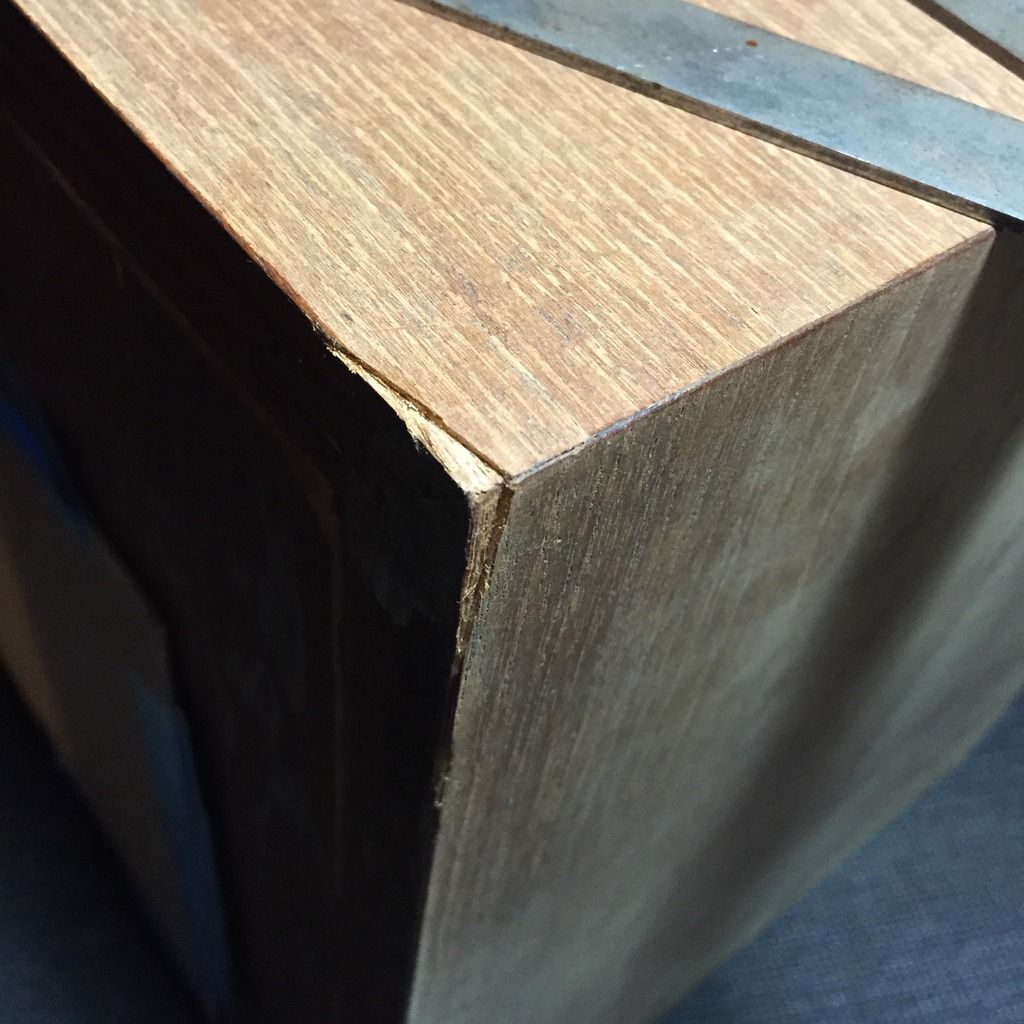
Here's some pics to give you an idea of the process. Straight cuts are always easier to patch than a curved cut. I also sand the edges slightly angled so the surface edges butt well when being glued in place.
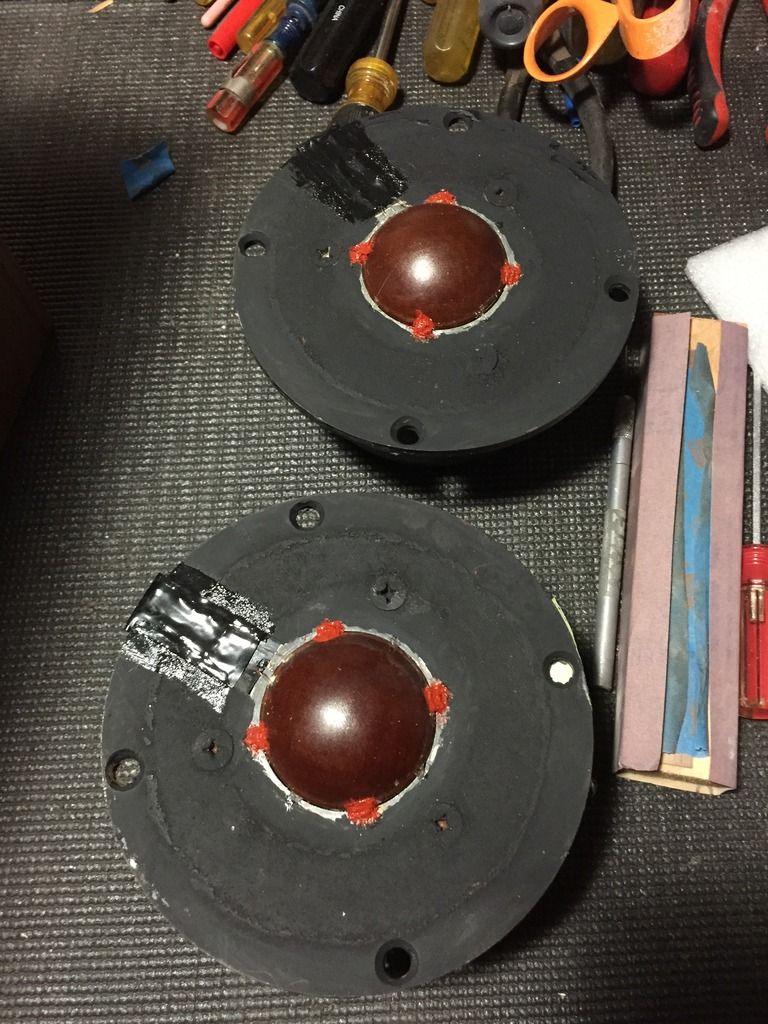
The mids from Roy. The domes are nice and free now to move as they should. Roy also put in new VC leads.
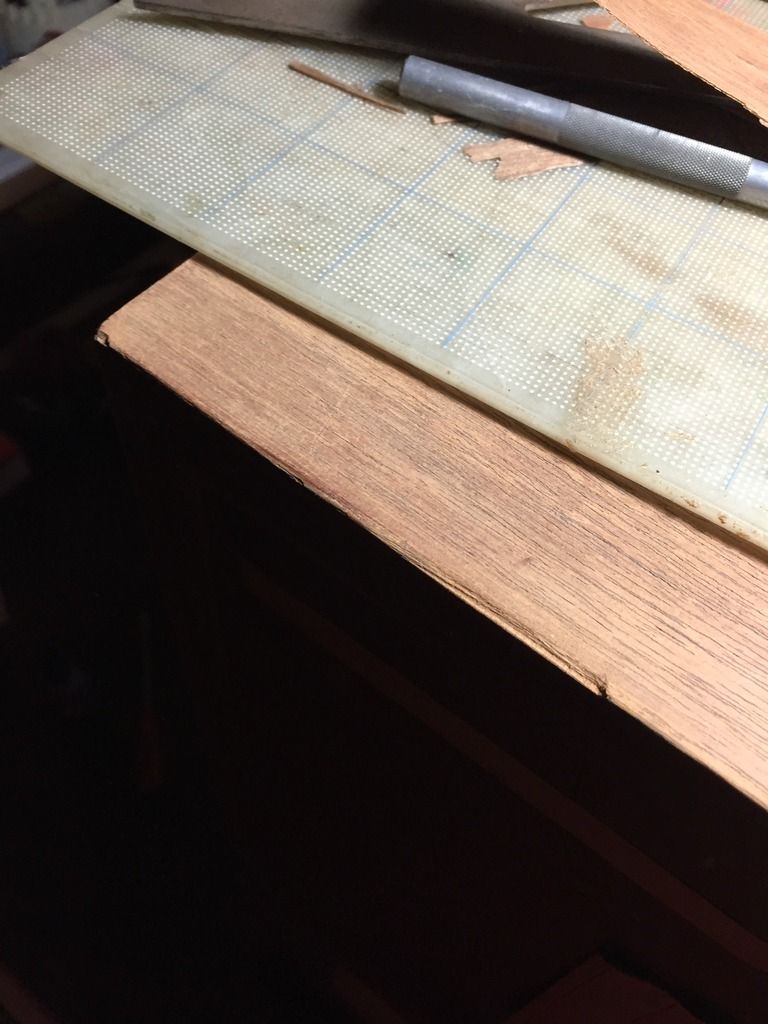
Sanded cab and some of the repairs.

Cut away the damaged area, made a paper template to cut the veneer patch.

-
3 hours ago, ra.ra said:
Hey Glenn, you got another great find there. Gorgeous speakers and great pics. Can I suggest maybe providing some temporary protection on those tweeters while you work on the cabinets? Looking forward to watching your progress. Carry on.
Hi Robert!
Yup, a total fluke I even stopped at this GW. I couldn't believe they were sitting there. Must have been dropped off that day as they didn't have a price tag on them, and there were some other speakers as well that I didn't even bother looking at when I spotted the 3's! Probably all donated by the same person. There were a few receivers and some other gear I wasn't interested in.
Yes, I'll cover the tweeters, thanks!
Glenn
-
5 hours ago, DavidDru said:
Looking good.
Edges and corners look pretty good overall actually. Bottoms a bit rougher as usual.
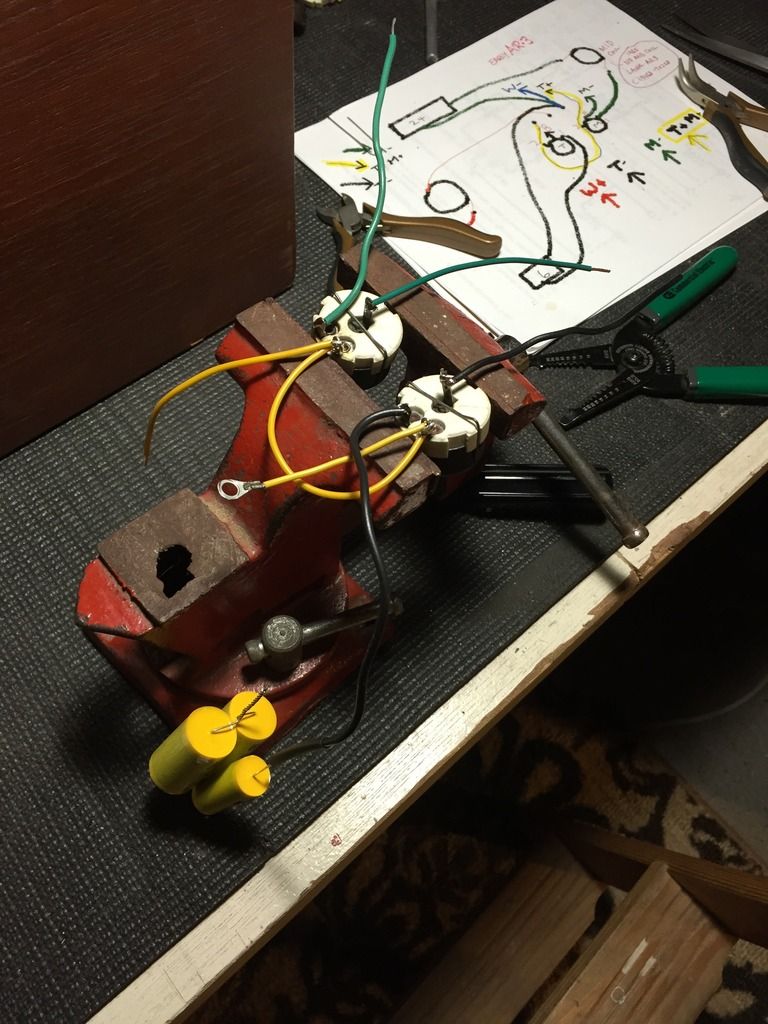
Your wiring diagram looks like mine!
Thanks David!
These are in very good overall shape, just some minor rear corner repairs needed.
Roy sent me that diagram back when I did my first 3 resto project.
Glenn
-
4 hours ago, stupidhead said:
looking great Glenn, any ideas on getting the grilles back to oem?
Hey Geoff!
I hope to. If I remember, doesn't Ken have some matching grill saran? It's been a few years since the first 3 restoration project.
I would need to make new frames though. The one original plastic frame is in pretty good shape with one crack at the top, easily repairable, but finding another original would be difficult.
I'll also need a pair of 3 pins. I have another AR badge I can use.
Cheers!
Glenn
-
1 hour ago, ar_pro said:
They're coming along nicely - great photos!
Please include any of the veneer work that you decide to do - I could look at before & after pictures all day.

You bet and thank you!
I've restored a number of speakers and pretty much have it down to a routine with this type of veneer work. Lots of fun!
Glenn
-
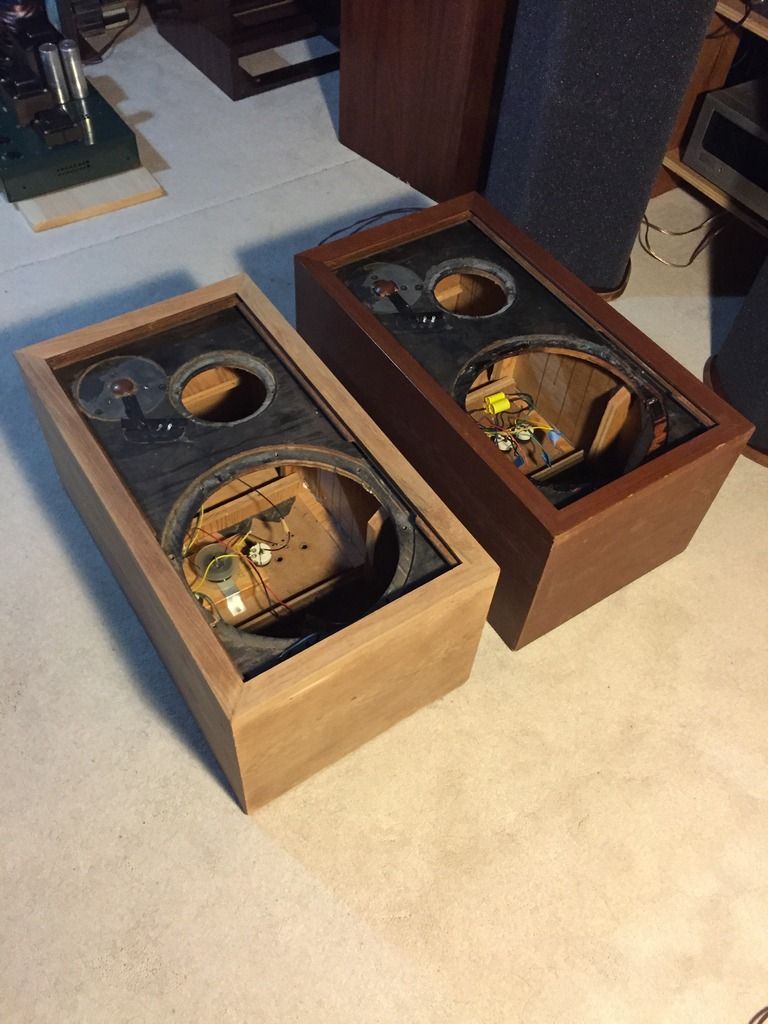
Making some progress.
Finished the recap, replaced the pots with nice cleaned ones I had ready to go.
Roy gave me advice on repairing the mids for better output, and my first attempt went unsuccessful, so I pulled them she shipped them off to Roy for his magic touch.
I soaked the pots in clear vinegar & salt solution, washed and rinsed with soap & water and they were in much better shape than I expected. I'll take the fine sanding wheel on the Dremel and polish up the disks and see how they test.
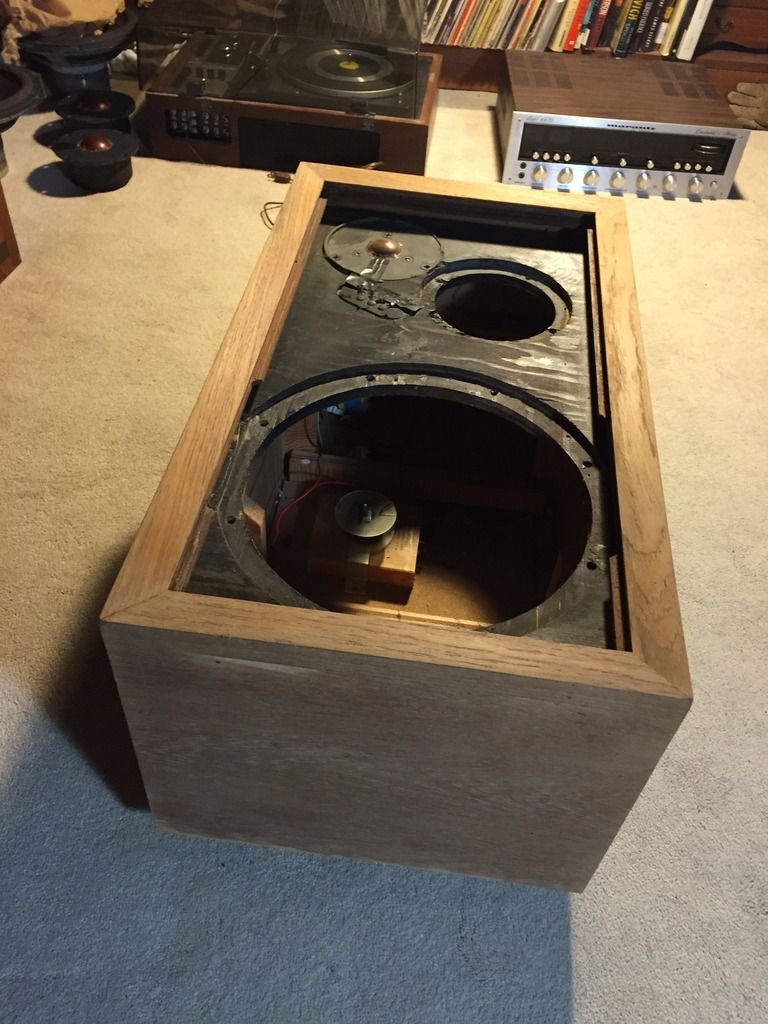
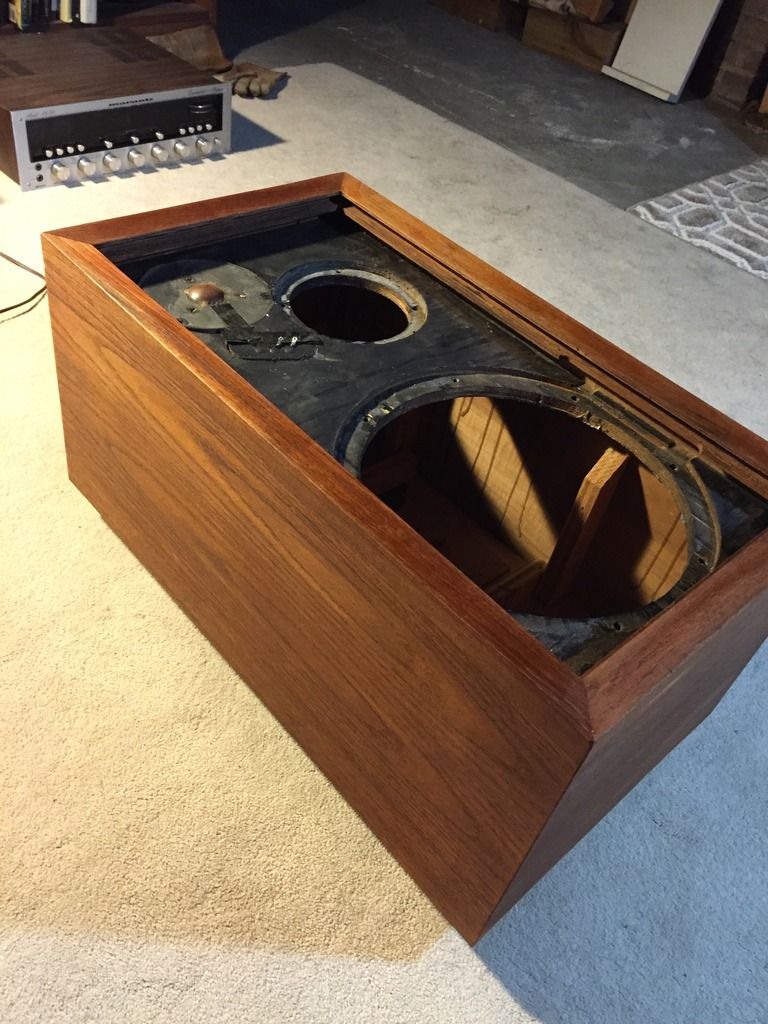
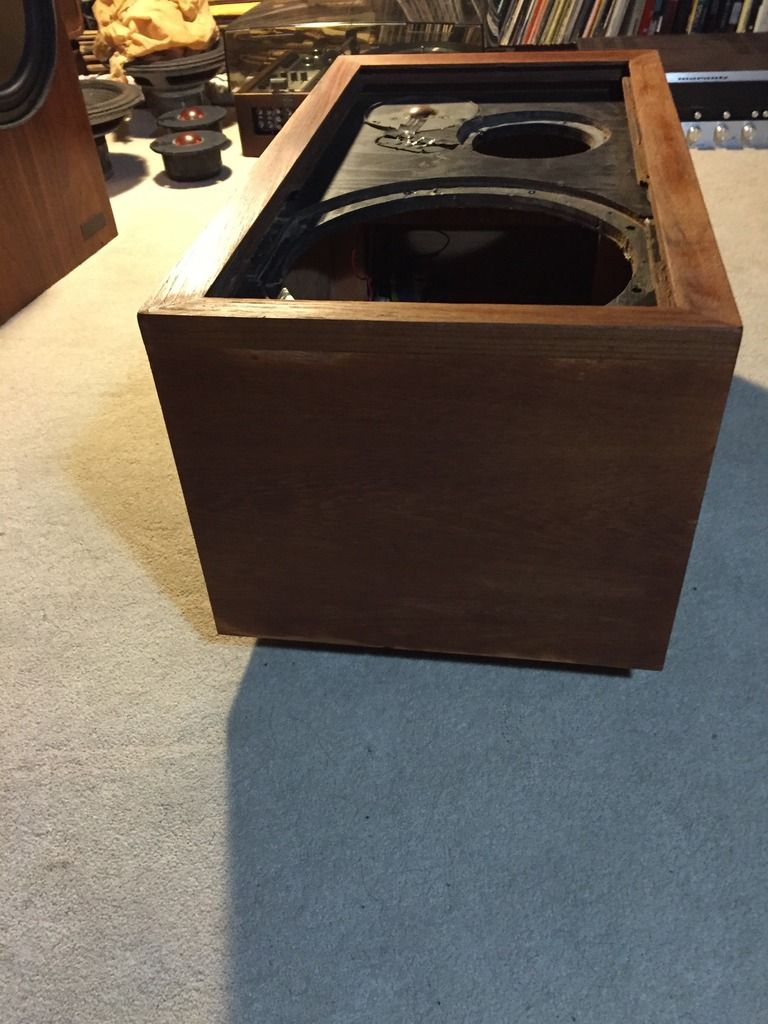
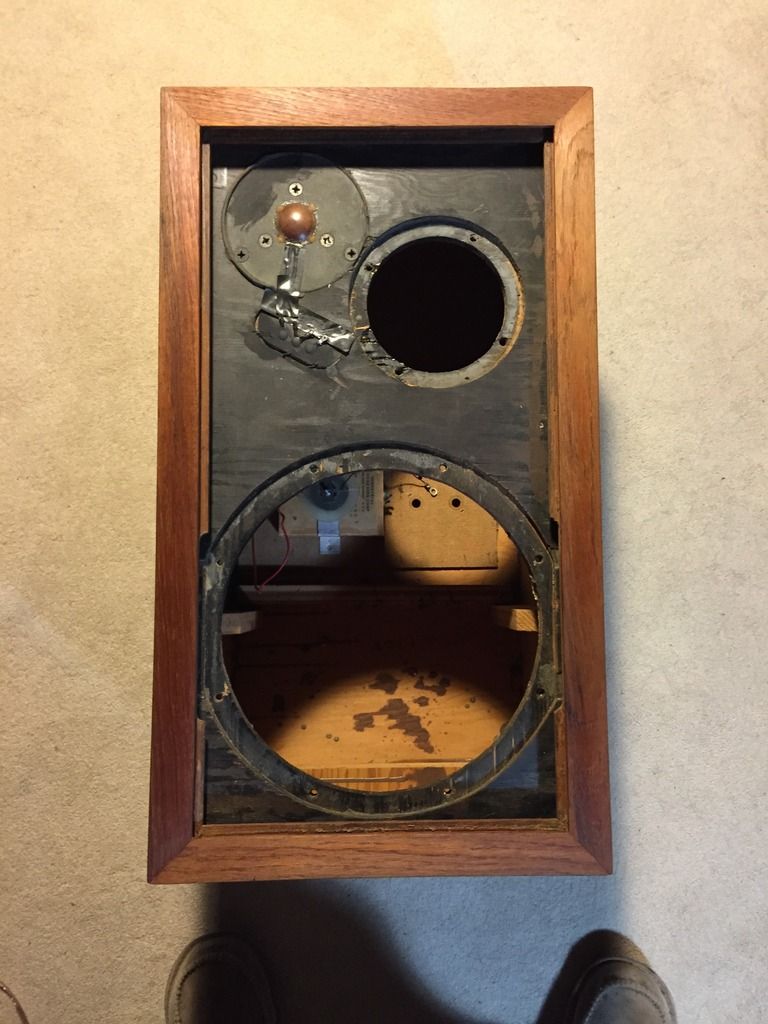
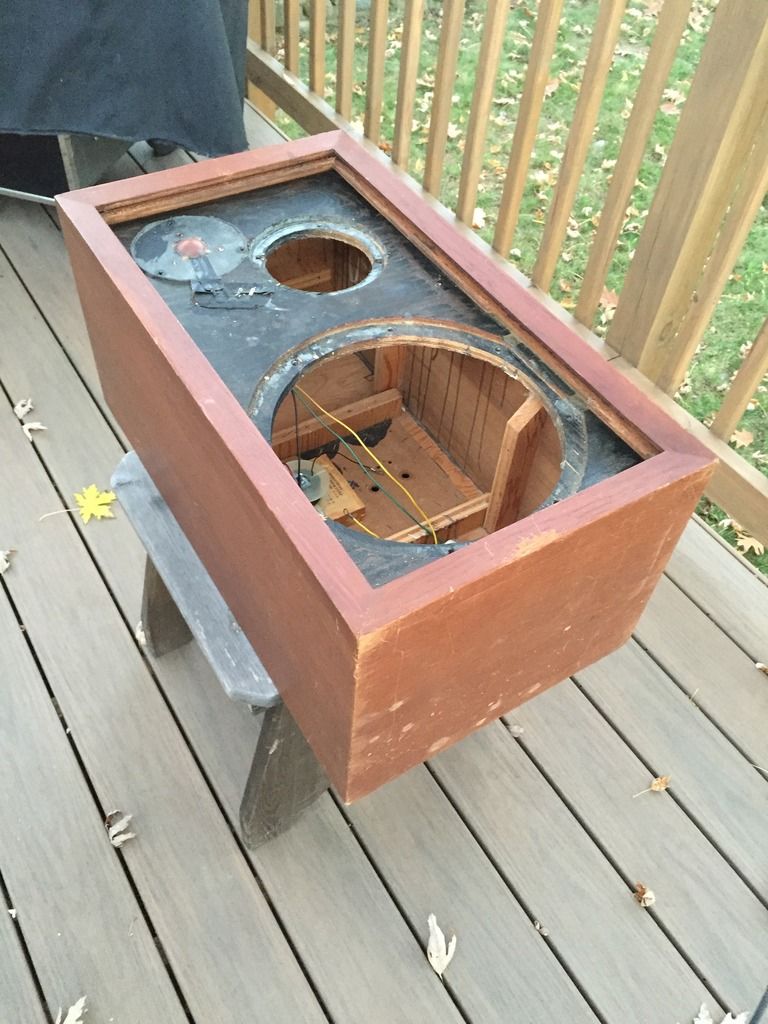
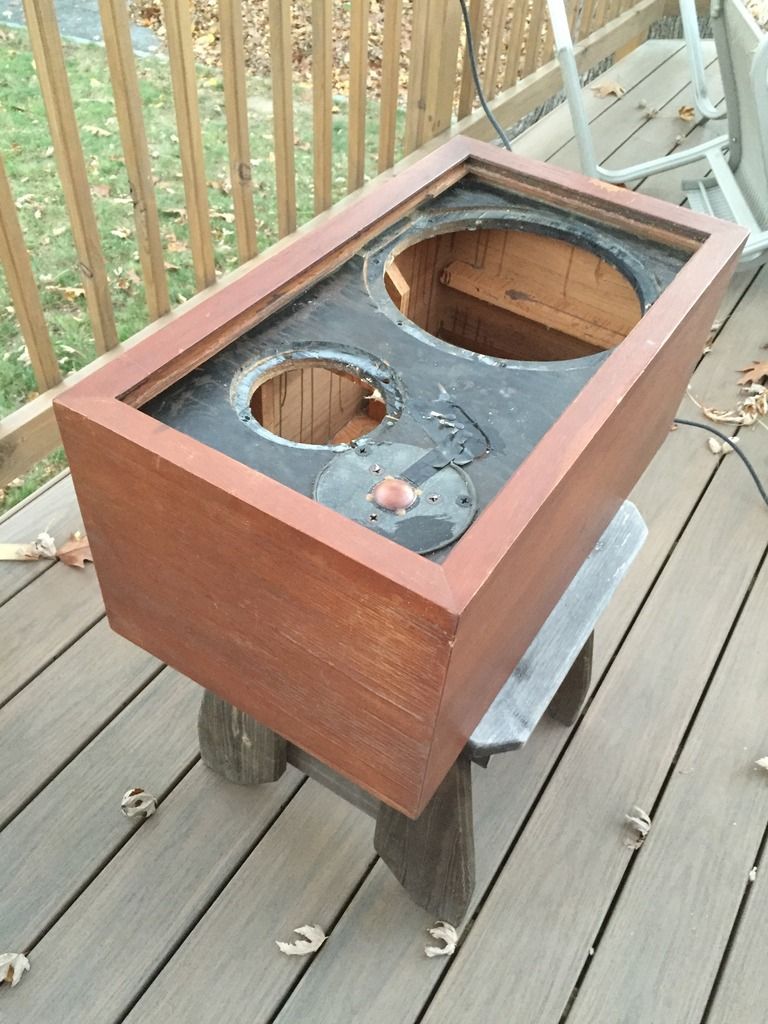
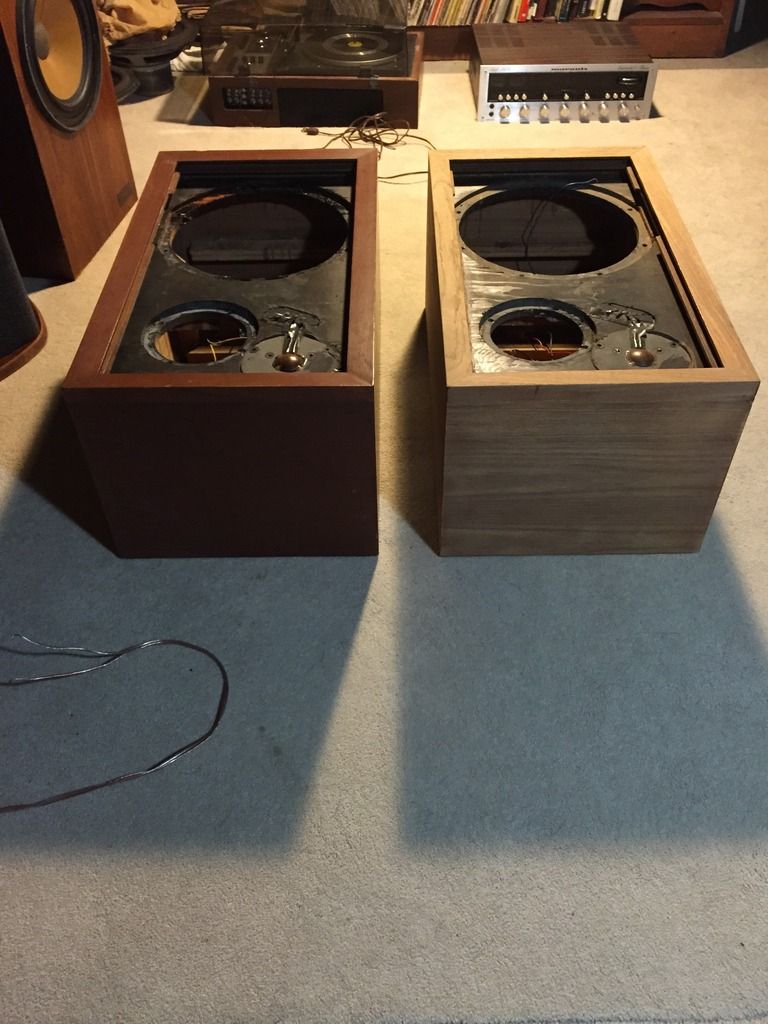
I got one cab sanded and ready for some minor veneer repairs. I also checked the woofer masonite rings and they were glued solid, good news there.
Here's some pics.
Glenn
The mid I attempted to repair.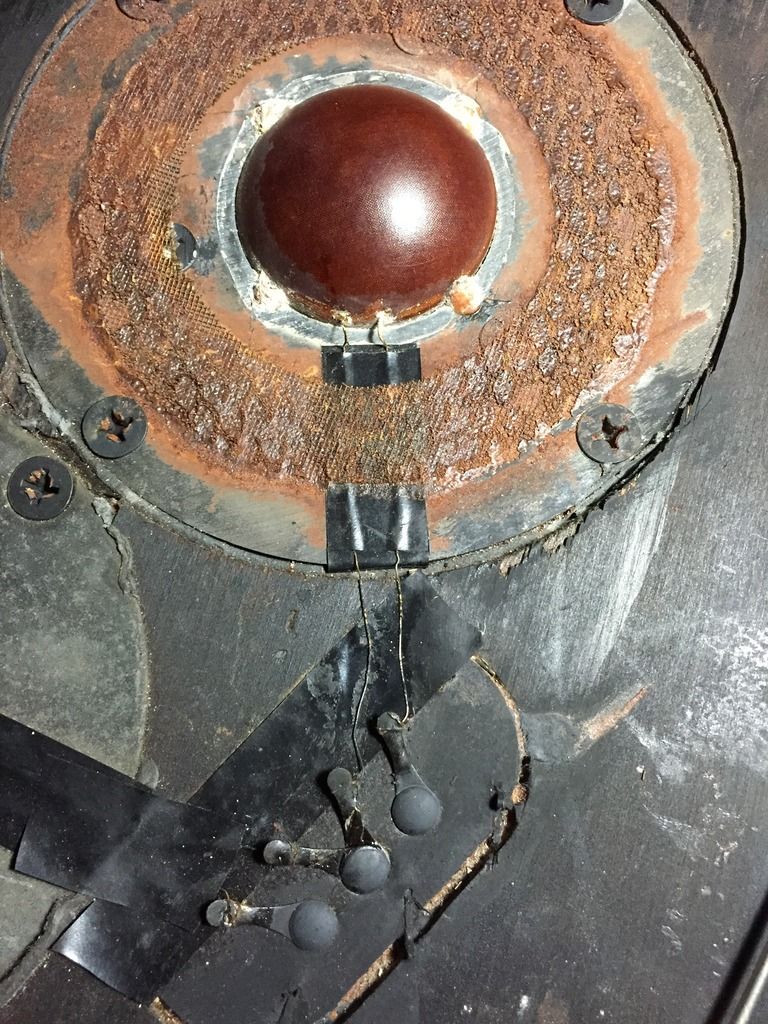

-
On October 31, 2016 at 11:19 AM, DavidDru said:
Ah yes, seeing the familiar rear labels from across the room and your heart starts racing, wondering what model AR it is and hoping it has a 3 in it. Like Christmas morning as a kid.
Hey David!
That was exactly what I thought! I practically sat on them until the manager came out to give me a price.
Glenn
-
On October 31, 2016 at 4:12 PM, Sonnar said:
Your words reminds me my Christmas of 50 years ago , 1966 , that Christmas morning I received a G.I. Joe ( by Hasbro ) with a complete U.S. Marine set, uniform, Machine gun, haversack, camouflage set, Jeep, tent, and I started to play with it while my father was listening his AR 3 , I remember Louis Armstrong and Bing Crosby singin' together , still I have that LP. Sorry for the little O.T. . Adriano

Wow! That brings back fond memories! My GI Joe had blond yellow painted hair.
-
On October 31, 2016 at 9:55 AM, Sonnar said:
You 're a lucky man! For 50 $ and an accurate works to restore it, You 'll have one of the best sounding speakers ever made. Congratulations ! Adriano
Lucky timing! This is my 2nd pair of 3's. My first I found at my local SA for 19.99. They needed more work on the cabs than these will need. I have the caps and hope to swap them in the next few days, as well as pots that are in great shape to replace the corroded ones. I'm praying the mids and tweeters are good. Next if the mids are good, I'll send them to Roy for refurbishing and hopefully he'll have the wire mesh that's missing. Then I'll sand the cabs to the veneer, do the repairs and refinish. One step at a time.
Im really excited to hear them!
Glenn


Stopped for toilet paper, found a pair of AR3's!
in Acoustic Research
Posted
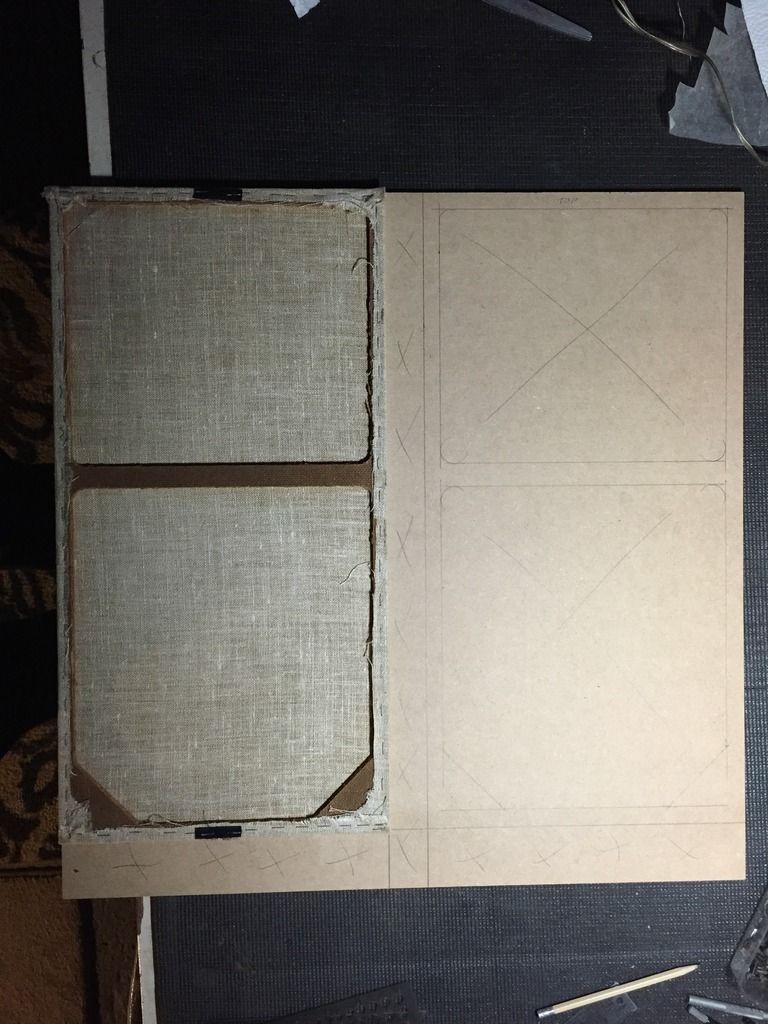
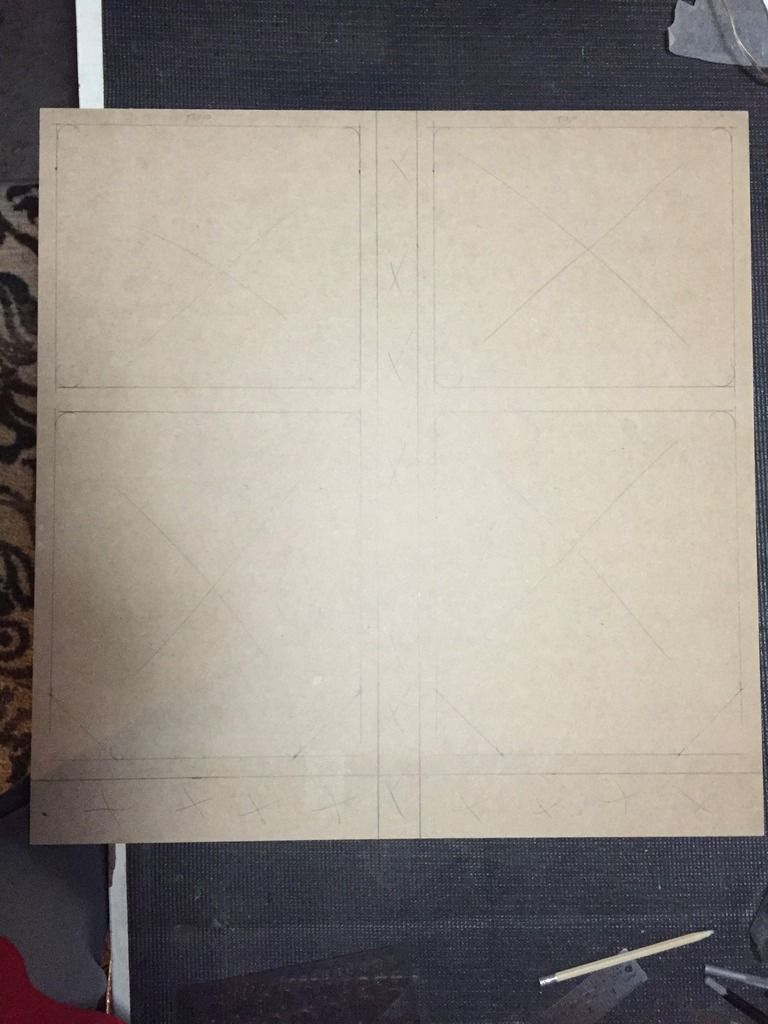
The grill frames are cut! Now, the difficult decisions we men have to make, which grill fabric?
I cut them with a little more meat around the sides for more stapling area and strength.