

ra.ra
-
Posts
2,130 -
Joined
-
Last visited
Content Type
Profiles
Forums
Events
Everything posted by ra.ra
-
Yeah, this seems to work fine for keeping these tinsel wires "protected" along the surface of the baffle board, but the tape wouldn't be practical on the cone surface. I may just try something that I have on hand that can be applied with precision - - maybe simple water-based white glue (Aleene's) that dries clear will be sufficient here.
-
Just wanted to include these images along with this thread - - these online pics show the AR-18LS, which I believe is Euro version identical to AR-18B, except for exterior cosmetics: cabinet styling, grille detail, rear terminals, etc. What I would expect to see is shown in first pic: square edge cabinet, vinyl wrapper, tweeter 034 with screen cover (shown next to little AR-8LS). Second pic shows a mild variation, with what appears to be the uncovered 038 tweeter and possibly a curious black stained pine cabinet? But I wanted to ask about the close-up tweeter pic that was part of this web link. It appears that the tiny tinsel wire leads are still connected to provide continuity, but clearly they have been dislodged from their original positions, as shown by the S-shape glue shadows. It is not at all uncommon to find these wires askew in an unintended position, but they are so fragile that they really should be affixed to the paper cone. Original documents show this adhesive named as Hapco 549-D - - - what would be a suitable type of glue to re-attach any loose wires on this type of tweeter?


-
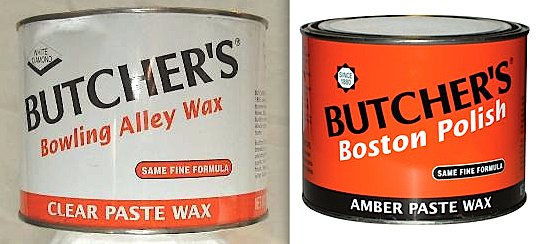
I like that wax, too, and the revenue from that popular product enabled the founder's grandson to commission this masterpiece of corporate headquarters in Racine, WI in the late 1930's.

-
Wax on a cutting board? Wow....who knew? Very interesting, thanks.
-
Thx, this is good to know - - I guess I was fortunate with this pair, and I had anticipated that I would probably need at least a little heat application, but no. Perhaps I should temper my newfound enthusiasm for the potential of other vinyl clad transformation projects that have been getting some sneaky looks from me lately (Yoo-hoo, AR-XB turntable and AR-28B speakers). Agreed, and thanks for that great image which shows off the natural honey color of better-quality MDF. And yep, paste wax is fun and easy to use - - I have tended to use Butcher's wax, available in clear and amber (and now brown, by popular demand!), but I also like Johnson paste wax. I think it may have been CSP member Roger from Reno who once stripped the vinyl off of his AR-7's, but I cannot recall if he ever used his favorite beeswax as a finish in that project. Ever since seeing the quality of work in several of your projects, I've begun to pay much more attention to this. Well, I hope you noticed who I quoted in the first post of this thread, and I have to say that the humor and attention to detail displayed in your AR turntable tutorials has stayed with me to try to develop a similar "tone" for an online voice. It takes a little digging, but I've found that the AR Drawings section (provided by Ken Kantor, I think) in the CSP Library contains a trove of information which is very useful in trying to better understand the history of the many speaker models and their various iterations. The labeling of documents is somewhat inconsistent, and for me accessing these drawings works better with certain web browsers than with others, but it's pretty cool to evaluate the original production documents as a starting point in a restoration project or as a confirmation of authenticity for collectors....or both.
-
Very good point - - if the sound is the only thing that matters and the visuals don't at all, this solution works very well. Surround vinyl with more vinyl. And definitely, the dimension of the albums or coffee table books will help to conceal the ugly beasts. ...or strip them for no cost as I have tried to point out. Uh-oh.... please, not those AR-93's and 94's again! Very well engineered speakers indeed, but well, shall we say, not among the most attractive products? Don't like the looks?....put a sock over it! This reminds me so much of Claes Oldenburg's idea for the 1976 bicentennial in Boston - his proposal was to place an enormous paper bag over the 52-story Prudential Tower, considered then (and now) by some to be an unavoidable eyesore on the cityscape. Not only did AR cut costs with the cheap cabinet construction and finish for the 93 and 94 models, but they failed to employ a qualified industrial designer to address the visual aesthetics that some potential owners (me, maybe?) desire in a product to be placed in their daily living environment. The spare, bare, and pared-down nature of my 'new' 18s speakers, with vinyl-stripped cabs, exposed MDF, cheap fresh caps, and retro screw terminals, is admittedly not suitable for everyone and their personal predilections, as was predicted at the very onset of this thread. That is perfectly OK with me, while still respectful of the tastes of others - - this project is just one set of thoughts about a rescue mission of one particular sad puppy with a huge, untapped personality that has found an appreciative and loving home. Mongrels only, no AKC pure breeds need apply.
-
Understood, and I mostly agree, but I am not trying to particularly advocate this vinyl painting process, just merely stating that it does remain a viable option under certain circumstances and with limited resources or expectations. In my case, the vinyl removal was so easy that it did not even require any heat or chemical assistance. Simply peel, grip and rip. Done and discard. Reminder: this thread is mostly about a wonderful low-end speaker model procured with spare change and a sharp eye. With not that much effort, these have been transformed from an ugly duckling (my opinion) into a beloved keepsake (again, just my opinion). My central point, which may be falling on deaf ears here, is that not every restoration or reclamation project requires the agonizing pain of the perfect capacitor selection, close scrutiny of veneer patterns and miter joint tightness, or the hiring of an auto body shop to accomplish some very modest goals. With reference back to the very first line in this thread, this message is simply about the possibility of having a great deal of fun, spending very little cash, and reaping the satisfying rewards that come from experiencing the performance of a very well-engineered audio product. Not everyone will ever be able to own stacked LST's or AR-9's, and I merely want to encourage the newbies and the lurking small budget wannabes to jump in and get involved with modest, affordable vintage audio.
-
That's pretty funny, but he's probably right, and I had my own coincidence regarding this earlier today. I was reading an article from Sunday's 9.10.17 NYT Style section about an Italian architect who renovated a small industrial compound in Milan, and one of the photo captions reads, "....the bedraggled brown vinyl wall covering in a room.....has been painted over in soft shades." And Kent, I have seen your cosmetic solutions with these projects before and again applaud the creativity. I think they all adhere pretty much to the early AR-KLH-Advent minimalist aesthetic without becoming austere and certainly not flashy. I guess my central point here is that there is more than one way to possibly jazz up your bedraggled vinyl cabinets for very short money if they might require a facelift. Just because they are ugly doesn't mean you have to leave them curbside or at the transfer station (i.e. town dump) or thrift store. The drivers alone in some of these castaways are really excellent, but at the same time I am very reluctant to become the poster boy for the "paint your vinyl" movement. It all sort of reminds me of a story an old friend relayed to me once when he told me about observing some guy in front of his house painting his old Studebaker with a roller. Sometimes there are ideas that just don't feel right, ya know? In concept, this is pretty much what I've had in mind with my someday pursuit of the "soft black" look, and maybe similar to what genek has implied, and nearly identical to ar-pro's restoration project of his AR-91's (I hope I have CSP member and AR model correct here from memory). My first alternative to larry's suggestion here would be a purely subjective one - - I would never want a high gloss finish - - only satin for me. And while many of us enjoy the creative process of re-habbing a pair of long-neglected vintage speakers, pocketbook practicality always needs to be a central factor in my project equations. For this AR-18s project, with nearly all parts on-hand and an attractive initial purchase price (proceeds to a charitable organization), total subsequent investment tallies less that five bucks, which sort of sums up the principal point of this thread , along with extolling the virtues of the AR-18s.
-
Oops, one more item to mention. I know people with faded aluminum house siding often had reasonable success re-painting the lapped "clapboards", but I don't know if it's ever been tried with vinyl house siding. Nonetheless, after thinking about the soft black that genek mentioned, I decided to conduct this silly imprecise experiment before I toss the cabinet vinyl. It is nearly impossible to successfully photograph black, but this pic does communicate some differences. I used four different black paints applied directly to the vinyl: the top two were thinned out brush applied eggshell and blackboard (ultra-matte) finishes; and the lower two were spray applied satin and gloss finishes. The spray finishes definitely allow the "grain" of the faux vinyl to read thru the paint in a more realistic fashion, but none of these finishes are quite right - - maybe a semi-gloss would be a better compromise for someone wanting to achieve a poor man's "ebonized" walnut finish.

-
These are the dims shown on the 18s cabinet drawing. Yeah, I think that is basically what we are discovering - - small production tweaks being made as situations evolve. I have kind of given up trying to understand the differences in these two tweeters - - for the longest time I merely assumed that it was simply cosmetic - - one (038) had black face paint while the other (034) included a protective screen cover. Otherwise, they appear virtually indistinguishable and the magnets are the same size (2-3/8" dia), even though the parts listings show different designations for the "metalwork asembly". In the pics attached, the 034 is on left; 038 on right. Yup, I couldn't agree more - - - this was particularly evident in several of these small two-way models from the mid 70's to early 80's.


-
Just a brief amendment here. The AR-18s cabinet drawing found in the Library includes some very detailed notes about materials and construction, and also confirms a number of production revisions which might account for the small differences discussed here. Also, it appears that the rear terminals that I have assembled are a facsimile of the those found on the Euro 18s, which is exactly the same as found in the variant AR-18LS, also a Euro model.


-
Thanks for the interesting information, ligs. This statement reminds me that I've heard our Euro friends mention that this model is something of a cult classic in the UK. This statement is crucial to the success of a few of the lower end models (18 and 28, maybe) of the 'S' and 'B' series that have these ultra-simple crossovers when you examine the slight changes in driver part numbers as cabinet volume increases. This statement also reminds me of the way the crossover became far more simplified in the final iteration of the wonderful AR-6 model. "Ken Kantor .... also mentioned that AR sold a lot of AR 18 to studios." High praise indeed from both seller (Kantor) and buyer (studios).
-
Hey Larry, I knew it was just a matter of time before you chimed in, and I was thinking about your impressive collection when I began this project. In fact, I dug up the thread where you described a recap and adding the binding posts, and I was considering ordering similar posts for these 18's before I decided to go 'old school' with the simple screw-nut terminals for reasons stated. Now you've got me curious to learn about your L-pad project. At one point, I did consider: should I add a two or three position attenuation switch? From the pic of your eight 18's, there's a few details I'd like to confirm. Upper left appears to have a different badge? Both in column 2 seem to include a one-piece plastic trim ring on the woofer? Despite your added binding posts, column 3 shows one each of the different terminal backsides: upper has square cut-out with masonite panel and terminal strip (like mine); while lower has circular cut-out with square plastic cup with cap attached to cup backside (see below). Larry's cabinets in column 3 point out something else I am now curious about: cabinet panel thickness. For the 18s pair shown in my project, the wood cabinet dimensions are: 9-5/8"w x 16-1/2"h x 6-1/4"d (published dims for depth will be greater since the grille projects beyond the cabinet). These cabinets utilize 1/2" thick side panels, which is the same as my AR-7's. By comparison, it appears that all of my AR-4 variations and multiple AR-6 cabinets use 5/8" thick side panels. My stable also includes pairs of AR-18B and 28B models, and these cabinets use 3/4" thick panel stock of lesser quality material. It appears to me that Larry's column 3 cabinets might be thicker than 1/2", perhaps contributing to the different sizes as he has noted. Pic attached shows AR-18B crossover (28B is identical) showing circular cut-out and lesser quality particle board.

-
All of the excellent ideas and supportive comments are most appreciated. Because the speaker performance remains essentially original, I did not really consider this a "mod" project even though one primary intent has been to achieve a renewed visual aesthetic. I suspected that even this level of revision might not be everyone's cup of tea, but at least no one has yet become aghast and accused me of blasphemy or sacrilege. genek Great minds think alike - - - I have been trying to find the right project to employ a homebrew version of the "soft black" finish, which of course looks fantastic with the light linen cloth. I thought about it here, and could always do so in the future, but in this case wanted to first try the blonde look. Also, these cabs utilize the really tight, fine-grained MDF which, depending on personal taste, lends itself to transparent finish applications. Re: black, see pic attached of AR-18s - - not my speakers, but they do look great. MI-pat It was your endless praise of these 1-1/4" tweeters that originally peaked my curiosity and stimulated my ongoing interest in the AR-6, 7, 4xa, the 18's, and many other subsequent models; and I clearly remember your 58s project with the light grille cloth and thought they looked simply great. And yes, I gave the idea of new wood veneer some consideration, too, but was trying to exercise discipline to keep this a "minimal" project. And about "pulling the vinyl": while I do not wish to advocate that everyone go immediately strip their original speaker cladding, I do have to say that yanking this nasty stuff off was possibly the single most satisfying step in many speaker restoration projects I've experienced. It feels really good and is instantly gratifying. Grip it and rip it, yahoo! JKent Thanks much for the kind words and added encouragement. I have absolutely no none nil zip nada zilcho idea of what's available on the market these days in new speaker options, but these little AR-18s are indeed fantastic small bookshelf speakers and can still be found for very, very, reasonable sale prices. My introduction to shellac was during 7th grade shop class (the girls took Home Economics back then) while in public school in Indiana, and then I forgot about it for about 40 or 50 years, but you never forget the unique smell (I mostly like it!). A pal of mine who is a harpsichord maker uses it in his gorgeous work, but he mixes his own from dry flakes and solvent (denatured alcohol), while I simply use off-the-shelf Zinsser Bulls Eye Shellac. It is available in clear and amber flavors, and I'd suggest to always thin liberally with more solvent. My mix here was about 1 part shellac to 4 parts alcohol and it was none too thin. Like everything, it requires some practice, but I'm just a weekend woodbutcher and even I can make it work. It tends to set up quickly, but if you make a mistake it can usually be rubbed out while still tacky or better yet after drying. It is an ancient substance, and it is derived from some type of tropical insect secretion. See Wiki page on this. ar_pro Hmmm... I had completely neglected to think to research Robert's Sound, but now I am curious about it. Am still unsure about grille choice, but like yourself, I rather like the black 'void' sans lower panel and may very well incorporate that as part of final solution.

-
And a few random views....


-
And the re-assembly...... About the crossovers: all original wire, but I just added some ring terminals and a little junction post, and filled cabinet slot holes with silicone. The caps measured slightly closer to 6uF than to 5uF, so I replaced them with dual 2.5uF mylar caps that I had on hand. About the terminals: the "classics" have terminals spaced 1-1/4" apart, but I opted for 1-3/4" spacing in order to use the holes left behind from the earlier terminal's rivets. Otherwise, these are pretty much like the early AR's, with lock washer and hex nut, etc. These are #8-32 screws, but instead of 3/4" length, these are 1" long to adequately extend beyond the 1/4" painted mahogany slat used on backside, which is sealed and secured with silicone. On the inside I added a rubber washer to ensure a tight seal but also as a slight shim, and the only knurled nuts available locally were brass. When fastened tight, these nuts sit at just the right elevation, allowing the cabinets to sit completely flat when laying on their backs. About the cabinets: the MDF cabinet panels had some small dings and very minor swelling, all of which was mostly made better with a simple hand block sander. Desiring a very minimal finish, I applied two very thinned coats of alcohol-based shellac and buffed it out to a near matte finish. On the backside, the original sales or service stickers were just too interesting to remove, and the AR-18s labels were attached using a hobby glue stick for adhesive. Rub-on numbers were used to identify the new terminals. About the grilles: still undecided what to do for long-term. The missing filler panel doesn't really bother me, but having another badge might eventually be nice. I have never liked the original deadly brown stretchy grille cloth. The grille frames fit great, but they place the grille fabric about 3/8" in front of the front cabinet edges instead of near flush like the classics. For short-term test run, I'm trying out some AR-7 grilles and as always, I think the off-white linen looks best. Am now done with this project for the time being, and these speakers are indeed little giant killers - - no wonder they were so popular as recording studio monitors. Sometime soon I hope to do a little side-by-side comparison with AR-7's and AR-18B's.


-
With all of the recent threads about 4 and 5-figure sales prices for speakers, mega-watt amplification, and misplaced fervor regarding highly collectible models, this simple project from the other side of the tracks is bound to lull some of you to sleep with its low-rent appeal. On another audio forum, I was recently engaged in conversation with a member who has several pairs of quasi-rare 8" two-way AR's (AR-15, AR-17 and AR-25), and that dialog sort of prompted this thread to share an experience with a more common model. Much like the urge to rescue the irresistible sad-eyed puppy from the local animal shelter, these speakers were begging for a good home, so they jumped into two shopping tote bags and came home with me on the subway. Consider this another from the series: In Praise of Small Speakers. This is a pair of the AR-18s - - circa 1981, week 16 - - which came to me in reasonably good condition and with ample potential. Drivers were all very good - - no punched-in tweeter dust caps, and the woofers even had new foams and (non-original?) outer gaskets, which were a bit rough. The grille frames are perfect with all friction pegs intact, and the grille fabric is in G to VG condition. One cabinet is missing the small bottom filler panel and badge (anyone have a spare badge?). The 8" woofer p/n is 200037 (5.0 and 5.2 ohms DCR), the 1-1/4" tweeter is p/n 200038 (5.1 and 5.3 ohms DCR), and the entire crossover is just a simple 5uF cap in line with the tweeter. One minor point of interest was to note that the woofers are secured with machine screws and T-nuts while the tweeters use 1" wood screws. Took 'em home, wired 'em up, all is functional, sound is very good....now what to do? After a week of consideration, I decided to disassemble everything and make revisions to the areas I found unsuitable: the cabinet finish and the wire terminals. These original spring terminals are cheap things but they actually work pretty well with bare wire or pin terminals. But because I tend to use small ring terminals on speaker wire, my decision was to forego the idea of new 5-way binding posts and instead re-create simple screw terminals like the original "Classics". Just gotta admit it - - I really dislike the vinyl faux wood cladding on certain AR models, and this covering was already beginning to peel or bubble up in several areas and it just felt kinda nasty. Interesting to observe that this vinyl was put on as a single piece - - there is only one seam per cabinet, and you can locate it by closely inspecting the wood "grain" where it mismatches as it bends around the corners. Nonetheless, the vinyl had to go, and it simply peeled off "faster than a prom dress" (thx to John for my all-time favorite CSP quote). I also decided to remove and relocate the unnecessary and unsightly original model label from the front baffle board since it visually disrupted the otherwise simple and symmetrical layout. My intent was to create my own (budget based) silk purse from this sow's ear.


-
You're probably right, harry398, and I'm just trying to find someone to address this notion from a qualitative experiential perspective rather than solely from a quantitative set of laboratory data points. I very much like to obsess over comparative numbers as much as the next geeky dweeb, but as one sage advisor often noted, "It's all about the music." So my question boils down to: Unless someone can identify audible differences, why is anyone fussing with this in the first place? Until I am convinced that there might be noticeable audio improvements as a result of various tweeks or substitutions (new caps, new foams, functioning controls, etc.), my own re-build projects tend to focus on two other areas that are important to me: 1) improved visual aesthetics (cabs, grilles, etc.); and 2) improved build qualities (wiring, connectors, terminals, straps, etc.). For both of these areas, the term "improved" relates only to my own personal preferences, and is not meant to suggest an improvement for anyone else's speakers.
-
Thanks for the referenced study, Carl. I guess I did ask about measurements, but since I was hoping not to be dragged down that rabbit hole, I will ask my question seeking a more subjective response. Can anyone describe the perceptible audible performance differences that result from these "improved" coil orientations versus the original co-planar layouts? And, if there is a noticeable superior performance resulting from the revised placements, can it be assumed that multi-coil AR speakers that have not undergone this "correction" are not living up to their full potential?
-
I keep seeing this discussed in various conversations and I have no reason to doubt it .......... but exactly how does cross-talk present itself in a measurable or perceivable manner; in what ways does re-orientation provide improved performance; and why was this concept not enforced by AR engineers when the crossovers for these loudspeakers were originally laid out for fabrication?
-
Yeah, with a little patience and some rigorous perseverance and a bit of humility and a lot of questions, you can handle this restoration yourself and really enjoy the learning experience. Lots of voices coming at you from all angles, but don't bail out yet.
-
I don't know anything about that $80 tweeter or $120 midrange you showed, but before you abandon hope of saving both original tweets and mids, I'd suggest you contact the members (who have already been mentioned in this thread) who have demonstrated success at resuscitating these aging and rare AR drivers. If all works out, it might actually be less expensive than purchasing new (or used) drivers, and it will undoubtedly be a more satisfying restoration experience and provide the best results.
-
Good question, but this response might not help you much. I am currently working on a pair of AR-18s speakers dated 1981 (36 years old) with the same gray 50V Unicon caps and the same 038 tweeter. Upon initial testing, these speakers sounded very good, but I have not removed and measured the 5 uF capacitor yet. On hand, I have some new caps that are itching to go to work inside these speakers as replacements, but because I have fairly recently re-built some AR-6's and AR-7's (probably even ten years older than the 18's) where the original blue NPE Sprague caps measured so good that I left them intact, I have not yet determined how to proceed on this AR-18s pair. Well, maybe I've just answered my own question - - I need to take the cap out of circuit and measure it before deciding what to do.
-
Oops, here is the AR-93 and 94 comparison I had meant to attach.

-
FYI, I had previously kept these drawings in a file, and they might have some useful information for you. One image confirms that, as you correctly suspected, the woofer foams were meant to be installed above the cones. A second image compares the parts of the AR-93 and AR-94, including driver p/n's and stuffing quantities, and cabinet drawings show that the 93 mid is installed in its own separate compartment, but not so in the 94. The third image shows the 93 crossover.


